Enable User VMs with Multiple Displays
A VM may want to run an OS with a graphical desktop or provide an application with a human-machine interface (HMI) display. You can enable a graphical display by using virtio GPU.
Virtio GPU lets a VM present multiple windowed virtual displays on the physical monitor. Virtio GPU also allows multiple VMs to share the same physical display, for example, where the service VM has a Linux desktop window and a Windows-based User VM has its desktop in a window on the same physical monitor.
Virtio GPU is a virtio-based graphics adapter that provides a VM with one or more virtual displays that show on the Service VM’s monitor in either windowed or borderless full screen mode.
In ACRN, virtio GPU operates in 2D mode only and does not support offloading rendering operations to a physical GPU. To do that, you must enable SR-IOV of the physical GPU and passthrough one virtual function (VF) to each VM requiring a virtual display.
Dependencies and Constraints
Consider the following dependencies and constraints:
Virtio GPU only works with post-launched standard (non real-time) VMs.
Virtio GPU works best with virtual functions (VFs) of the physical GPUs. Without the VFs, the post-launched VM must use CPU rendering.
Virtio GPU allows virtualizing multiple displays for one VM. All displays must operate in the same mode, either windowed or borderless Full screen. In either mode, virtio GPU supports at most two virtual displays per VM.
The hosting Service VM’s OS needs to work in graphical mode (instead of the command line mode).
Note
The virtio GPU mechanism performs best with Single Root I/O Virtualization (SR-IOV) so that frames can be rendered by SR-IOV VF and displayed by virtio GPU. Without SR-IOV support on your hardware platform (and enabled in the BIOS settings), the VM can still render frames using the CPU, but this is typically less efficient.
Configuration Overview
Use the ACRN Configurator Tool to configure virtio GPU in the post-launched User VM’s basic parameters:

Click on the + to define a new virtio-GPU device. From there you can choose
between a window or a borderless``full screen`` display for this device.
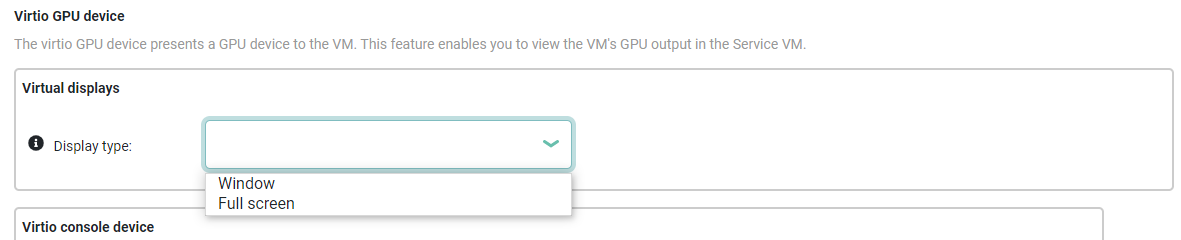
If you select window you can then choose the size of the window (from a
list), and the window’s top-left corner offset (in pixels) from the top-left
corner of the screen, as shown in the following example.
Configuration Example
The following steps show how to select and verify a virtio GPU device by extending the information provided in the Getting Started Guide.
In the ACRN Configurator, update the shared scenario you created with a Service VM and one post-launched User VM by adding these virtio-GPU settings to the User VM.
Open the “POST_STD_VM1” -> “Basic Parameters” and scroll down to the “virtio GPU device” settings. Click on the “+” to create a new virtual display device and fill out the display settings:
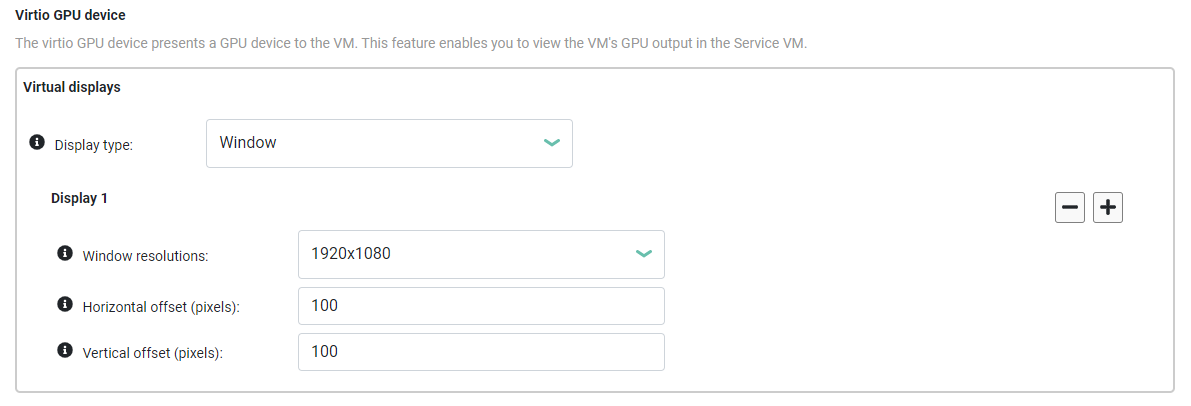
In this example, we selected a window device (instead of a full screen device) with a 1920x1080 size, and with the top-left corner 100 pixels down and to the right of the (Service VM) display’s top-left corner.
Save the scenario and launch script.
Follow the Getting Started Guide instructions to build ACRN and copy all the necessary files from the development computer to the target system.
Reboot the target system to launch the Service VM and use the launch script to start the post-launched User VM.
Unlike in the original Getting Started Guide, this time when the Post-launched User VM starts Ubuntu, the login screen uses the virtio GPU display in a windowed area instead of being full screen.