Enable ACRN Over QEMU/KVM
This document shows how to bring up ACRN as a nested hypervisor on top of QEMU/KVM with basic functionality such as running a Service VM and User VM. Running ACRN as a nested hypervisor gives you an easy way to evaluate ACRN in an emulated environment instead of setting up a separate hardware platform configuration.
This setup was tested with the following configuration:
ACRN hypervisor:
v3.0tagACRN kernel:
acrn-v3.0tagQEMU emulator version: 4.2.1
Host OS: Ubuntu 20.04
Service VM/User VM OS: Ubuntu 20.04
Platforms tested: Kaby Lake, Skylake, Whiskey Lake, Tiger Lake
Prerequisites
Make sure the platform supports Intel VMX as well as VT-d technologies. On Ubuntu 20.04, this can be checked by installing the
kvm-oktool found in thecpu-checkerpackage.sudo apt install cpu-checker
Run the
kvm-oktool and if the output displays KVM acceleration can be used, the platform supports Intel VMX and VT-d technologies.kvm-ok INFO: /dev/kvm exists KVM acceleration can be used
The host kernel version must be at least 5.3.0 or above. Ubuntu 20.04 uses a 5.8.0 kernel (or later), so no changes are needed if you are using it.
Make sure KVM and the following utilities are installed.
sudo apt update && sudo apt upgrade -y
sudo apt install qemu-kvm virtinst libvirt-daemon-system -y
Prepare Service VM (L1 Guest)
Use the
virt-installcommand to create the Service VM.virt-install \ --connect qemu:///system \ --name ServiceVM \ --machine q35 \ --ram 4096 \ --disk path=/var/lib/libvirt/images/servicevm.img,size=32 \ --vcpus 4 \ --virt-type kvm \ --os-type linux \ --os-variant ubuntu20.04 \ --graphics none \ --clock offset=utc,tsc_present=yes,kvmclock_present=no \ --qemu-commandline="-machine kernel-irqchip=split -cpu Denverton,+invtsc,+lm,+nx,+smep,+smap,+mtrr,+clflushopt,+vmx,+x2apic,+popcnt,-xsave,+sse,+rdrand,-vmx-apicv-vid,+vmx-apicv-xapic,+vmx-apicv-x2apic,+vmx-flexpriority,+tsc-deadline,+pdpe1gb -device intel-iommu,intremap=on,caching-mode=on,aw-bits=48" \ --location 'http://archive.ubuntu.com/ubuntu/dists/focal/main/installer-amd64/' \ --extra-args "console=tty0 console=ttyS0,115200n8"
Walk through the installation steps as prompted. Here are a few things to note:
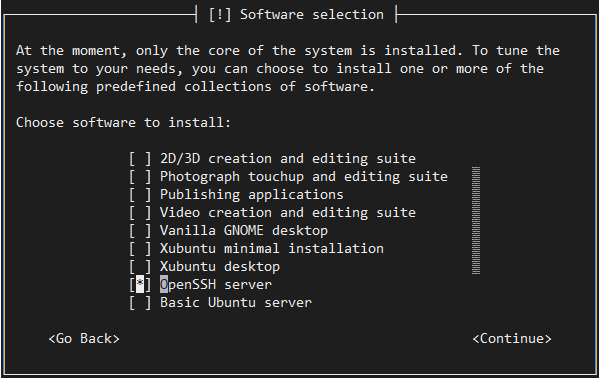
Make sure to install an OpenSSH server so that once the installation is complete, you can SSH into the system.
We use GRUB to boot ACRN, so make sure you install it when prompted.

After the installation is complete, the Service VM (guest) will restart.
Log in to the Service VM guest. Find the IP address of the guest and use it to connect via SSH. The IP address can be retrieved using the
virshcommand as shown below.virsh domifaddr ServiceVM Name MAC address Protocol Address ------------------------------------------------------------------------------- vnet0 52:54:00:72:4e:71 ipv4 192.168.122.31/24
Once logged into the Service VM, enable the serial console. Once ACRN is enabled, the
virshcommand will no longer show the IP.sudo systemctl enable serial-getty@ttyS0.service sudo systemctl start serial-getty@ttyS0.service
Enable the GRUB menu to choose between Ubuntu and the ACRN hypervisor. Modify
/etc/default/gruband edit these entries:GRUB_TIMEOUT_STYLE=menu GRUB_TIMEOUT=5 GRUB_CMDLINE_LINUX_DEFAULT="" GRUB_GFXMODE=text
Check the rootfs partition with
lsblk, it isvda5in this example.The Service VM guest can also be launched again later using
virsh start ServiceVM --console. Make sure to use the domain name you used while creating the VM in case it is different thanServiceVM.
This concludes the initial configuration of the Service VM. The next steps will install ACRN in it.
Install ACRN Hypervisor
Launch the
ServiceVMService VM guest and log into it (SSH is recommended but the console is available too).Important
All the steps below are performed inside the Service VM guest that we built in the previous section.
Install the ACRN build tools and dependencies following the Getting Started Guide. Note again that we’re doing these steps within the Service VM and not on a development system as described in the Getting Started Guide.
Switch to the ACRN hypervisor
v3.0tag.cd ~ git clone https://github.com/projectacrn/acrn-hypervisor.git cd acrn-hypervisor git checkout v3.0
Build ACRN for QEMU:
We’re using the qemu board XML and shared scenario XML files supplied from the repo (
misc/config_tools/data/qemu) and not generated by the board inspector or configurator tools.make BOARD=qemu SCENARIO=shared
For more details, refer to the Getting Started Guide.
Install the ACRN Device Model and tools:
sudo make install
Copy
acrn.32.outto the Service VM guest/bootdirectory.sudo cp build/hypervisor/acrn.32.out /boot
Clone and configure the Service VM kernel repository following the instructions in the Getting Started Guide and using the
acrn-v3.0tag. The User VM (L2 guest) uses thevirtio-blkdriver to mount the rootfs. This driver is included in the default kernel configuration as of theacrn-v3.0tag.Update GRUB to boot the ACRN hypervisor and load the Service VM kernel. Append the following configuration to the
/etc/grub.d/40_custom.menuentry 'ACRN hypervisor' --class ubuntu --class gnu-linux --class gnu --class os $menuentry_id_option 'gnulinux-simple-e23c76ae-b06d-4a6e-ad42-46b8eedfd7d3' { recordfail load_video gfxmode $linux_gfx_mode insmod gzio insmod part_msdos insmod ext2 echo 'Loading ACRN hypervisor ...' multiboot --quirk-modules-after-kernel /boot/acrn.32.out root=/dev/vda5 module /boot/vmlinuz-5.10.115-acrn-service-vm Linux_bzImage }Note
If your rootfs partition isn’t vda5, please change it to match with yours. vmlinuz-5.10.115-acrn-service-vm is the kernel image of Service VM.
Update GRUB:
sudo update-grub
Enable networking for the User VMs:
sudo systemctl enable systemd-networkd
sudo systemctl start systemd-networkd
Shut down the guest and relaunch it using
virsh start ServiceVM --console. Select theACRN hypervisorentry from the GRUB menu.Note
You may occasionally run into the following error:
Assertion failed in
file arch/x86/vtd.c,line 256 : fatal error
. This is a transient issue; try to restart the VM when that happens. If you need a more stable setup, you can work around the problem by switching your native host to a non-graphical environment (sudo systemctl set-default multi-user.target).Use
dmesgto verify that you are now running ACRN.dmesg | grep ACRN [ 0.000000] Hypervisor detected: ACRN [ 2.337176] ACRNTrace: Initialized acrn trace module with 4 cpu [ 2.368358] ACRN HVLog: Initialized hvlog module with 4 cpu [ 2.727905] systemd[1]: Set hostname to <ServiceVM>.
Note
When shutting down the Service VM, make sure to cleanly destroy it with these commands, to prevent crashes in subsequent boots.
virsh destroy ServiceVM # where ServiceVM is the virsh domain name.
Bring Up User VM (L2 Guest)
Build the User VM disk image (
UserVM.img) following Build the Ubuntu KVM Image and copy it to the Service VM (L1 guest). Alternatively you can use an Ubuntu Desktop ISO image. Rename the downloaded ISO image toUserVM.iso.Transfer the
UserVM.imgorUserVM.isoUser VM disk image to the Service VM (L1 guest).Copy OVMF.fd to launch User VM.
cp ~/acrn-hypervisor/devicemodel/bios/OVMF.fd ~/
Update the script to use your disk image (
UserVM.imgorUserVM.iso).#!/bin/bash # Copyright (C) 2020-2022 Intel Corporation. # SPDX-License-Identifier: BSD-3-Clause function launch_ubuntu() { vm_name=ubuntu_vm$1 logger_setting="--logger_setting console,level=5;kmsg,level=6;disk,level=5" #check if the vm is running or not vm_ps=$(pgrep -a -f acrn-dm) result=$(echo $vm_ps | grep "${vm_name}") if [[ "$result" != "" ]]; then echo "$vm_name is running, can't create twice!" exit fi #for memsize setting mem_size=1024M acrn-dm -m $mem_size -s 0:0,hostbridge \ -s 3,virtio-blk,~/UserVM.img \ -s 4,virtio-net,tap=tap0 \ --cpu_affinity 1 \ -s 5,virtio-console,@stdio:stdio_port \ --ovmf ~/OVMF.fd \ $logger_setting \ $vm_name } # offline Service VM CPUs except BSP before launching User VM for i in `ls -d /sys/devices/system/cpu/cpu[1-99]`; do online=`cat $i/online` idx=`echo $i | tr -cd "[1-99]"` echo cpu$idx online=$online if [ "$online" = "1" ]; then echo 0 > $i/online # during boot time, cpu hotplug may be disabled by pci_device_probe during a pci module insmod while [ "$online" = "1" ]; do sleep 1 echo 0 > $i/online online=`cat $i/online` done echo $idx > /sys/devices/virtual/misc/acrn_hsm/remove_cpu fi done launch_ubuntu 1