Run Ubuntu as the User VM
Prerequisites
This tutorial assumes you have already set up the ACRN Service VM on an Intel NUC Kit. If you have not, refer to the following instructions:
Install a Ubuntu 18.04 desktop ISO on your board.
Follow the instructions Install the Ubuntu Service VM on the NVMe Disk to set up the Service VM.
Before you start this tutorial, make sure the KVM tools are installed on the development machine and set IGD Aperture Size to 512 in the BIOS settings (refer to Figure 38). Connect two monitors to your Intel NUC:
$ sudo apt install qemu-kvm libvirt-clients libvirt-daemon-system bridge-utils virt-manager ovmf
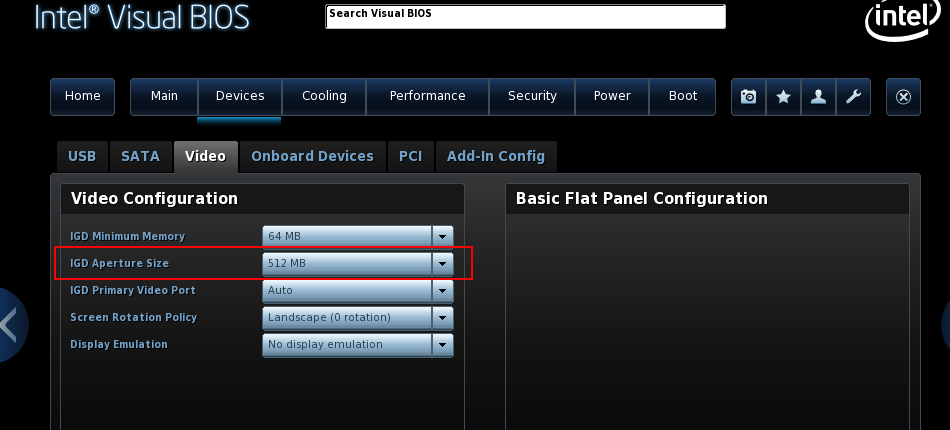
Figure 38 Intel Visual BIOS
We installed these KVM tools on Ubuntu 18.04; refer to the table below for our hardware configurations.
Hardware Configurations
Platform (Intel x86) |
Product/Kit Name |
Hardware | Description |
||
|---|---|---|---|---|
Kaby Lake |
NUC7i7DNH |
Processor |
|
|
Graphics |
|
|||
System memory |
|
|||
Storage capabilities |
|
|||
PC (development machine) |
Processor |
|
||
System memory |
|
|||
Storage capabilities |
|
|||
Validated Versions
Ubuntu version: 18.04
ACRN hypervisor tag: v2.2
Service VM Kernel version: v2.2
Build the Ubuntu KVM Image
This tutorial uses the Ubuntu 18.04 desktop ISO as the base image.
Download the Ubuntu 18.04 desktop ISO on your development machine:
Install Ubuntu via the virt-manager tool:
$ sudo virt-manager
Verify that you can see the main menu as shown in Figure 39 below.
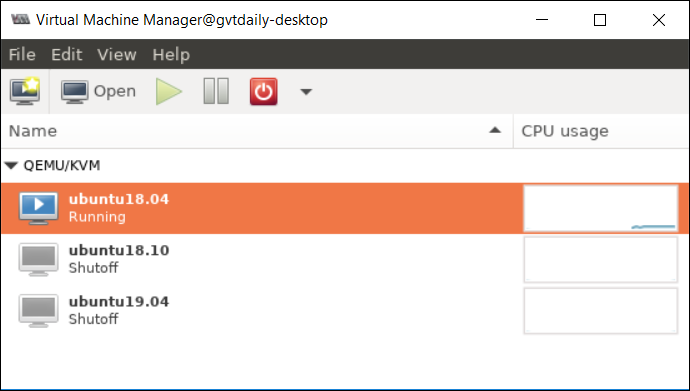
Figure 39 Virtual Machine Manager
Right-click QEMU/KVM and select New.
Choose Local install media (ISO image or CD-ROM) and then click Forward. A Create a new virtual machine box displays, as shown in Figure 40 below.
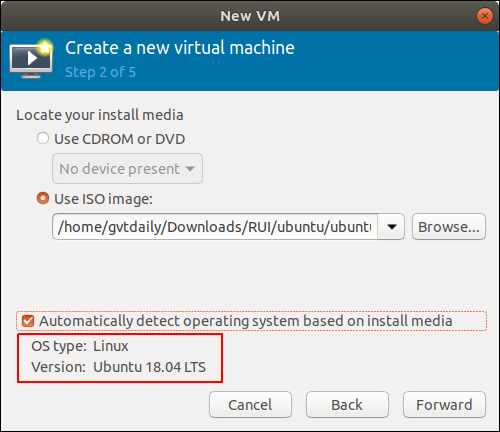
Figure 40 Create a New Virtual Machine
Choose Use ISO image and click Browse - Browse Local. Select the ISO that you get from Step 2 above.
Choose the OS type: Linux, Version: Ubuntu 18.04 LTS and then click Forward.
Select Forward if you do not need to make customized CPU settings.
- Choose Create a disk image for virtual machine. Set the
storage to 20 GB or more if necessary and click Forward.
Rename the image if you desire. You must check the customize configuration before install option before you finish all stages.
Verify that you can see the Overview screen as set up, as shown in Figure 41 below:
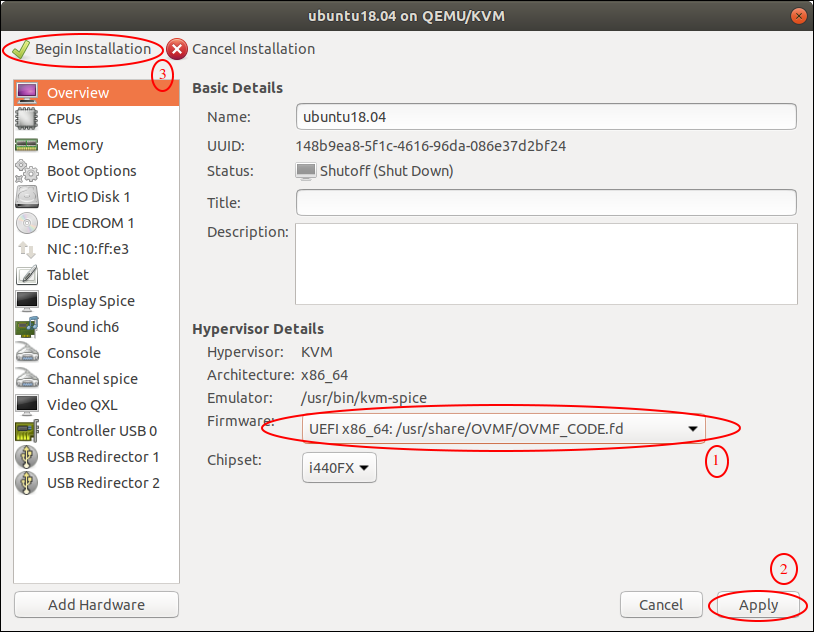
Figure 41 Debian Setup Overview
Complete the Ubuntu installation. Verify that you have set up the disk partition as follows:
/dev/vda1: EFI System Partition
/dev/vda2: File System Partition
Upon installation completion, click Restart Now to make sure the Ubuntu OS boots successfully.
The KVM image is created in the
/var/lib/libvirt/imagesfolder. Convert thegcow2format toimgas the root user:$ cd ~ && mkdir ubuntu_images && cd ubuntu_images $ sudo qemu-img convert -f qcow2 -O raw /var/lib/libvirt/images/ubuntu18.04.qcow2 uos.img
Launch the Ubuntu Image as the User VM
Modify the launch_win.sh script in order to launch Ubuntu as the User VM.
Note
This tutorial assumes SATA is the default boot drive; replace
/dev/sda1 mentioned below with /dev/nvme0n1p1 if you are
using an SSD.
Copy the
uos.imgto your Intel NUC:# scp ~/ubuntu_images/uos.img user_name@ip_address:~/uos.img
Log in to the ACRN Service VM, and create a launch script from the existing script:
$ cd ~
$ cp /usr/share/acrn/samples/nuc/launch_win.sh ./launch_ubuntu.sh
$ sed -i "s/win10-ltsc.img/uos.img/" launch_ubuntu.sh
Assign USB ports to the Ubuntu VM in order to use the mouse and keyboard before the launch:
$ vim launch_ubuntu.sh

<Add below as the acrn-dm parameter>
-s 7,xhci,1-2:1-3:1-4:1-5 \
Note
This will assign all USB ports (2 front and 2 rear) to the User VM. If you want to only assign the USB ports at the front, use this instead:
-s 7,xhci,1-2:1-3 \
Refer to Device Model Parameters for ACRN for more information.
Launch the Ubuntu VM after logging in to the Service VM:
$ sudo sh launch_ubuntu.sh
View the Ubuntu desktop on the secondary monitor, as shown in Figure 42 below:
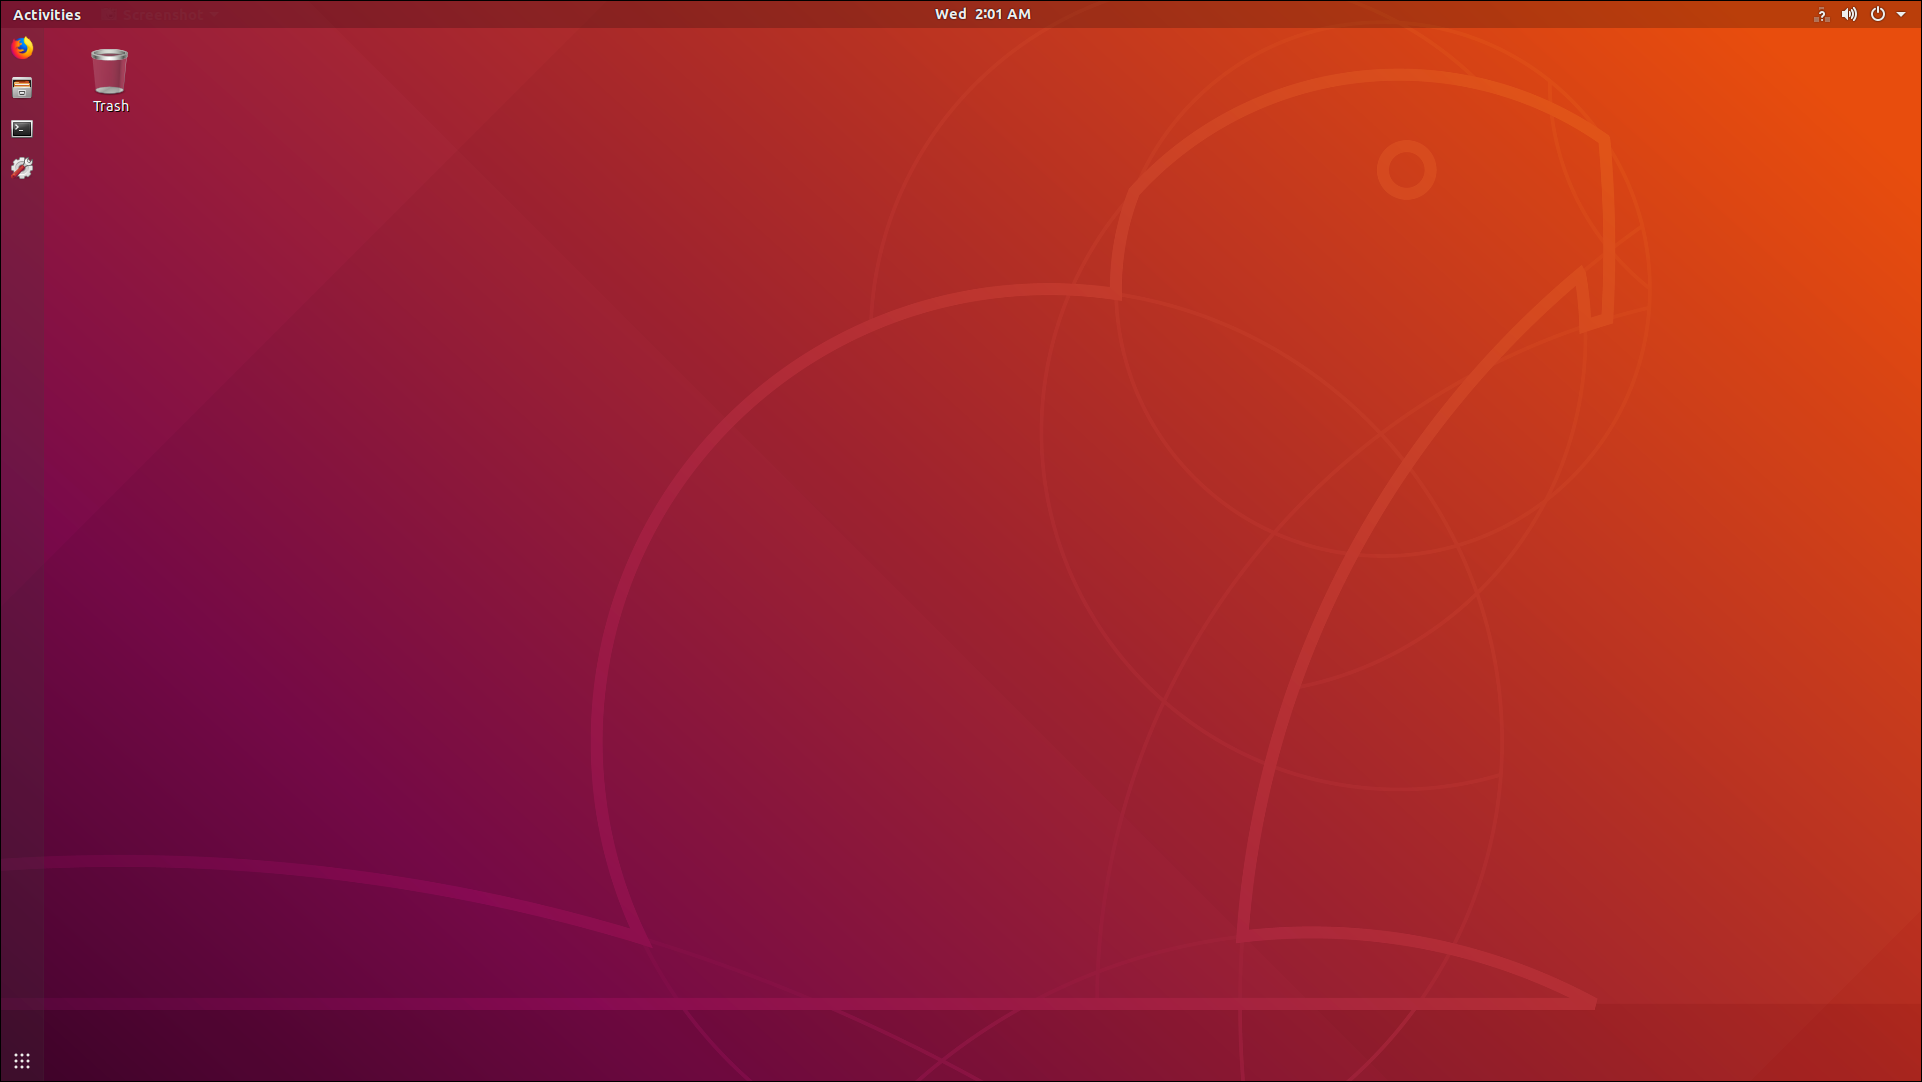
Figure 42 The Ubuntu desktop on the secondary monitor
Enable the Ubuntu Console Instead of the User Interface
After the Ubuntu VM reboots, follow the steps below to enable the Ubuntu VM console so you can make command-line entries directly from it.
Log in to the Ubuntu user interface and launch Terminal from the Application list.
Add
console=ttyS0,115200to the grub file on the terminal:$ sudo vim /etc/default/grub <Add console=ttyS0,115200> GRUB_CMDLINE_LINUX="console=ttyS0,115200" $ sudo update-grub $ sudo poweroff
Modify the launch script to enable
virtio-consolefor the Ubuntu VM:$ vim ~/launch_ubuntu.sh <add below to the acrn-dm command line> -s 9,virtio-console,@stdio:stdio_port \
Log in to the Service VM and launch Ubuntu. Verify that you see the console output shown in Figure 43 below:
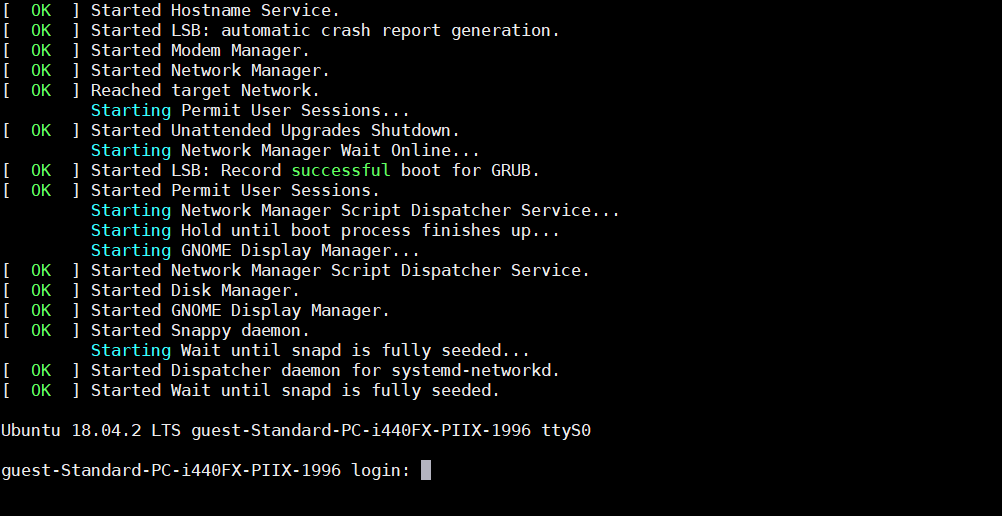
Figure 43 Ubuntu VM console output