ACRN Configurator Tool
This guide describes all features and uses of the tool.
About the ACRN Configurator Tool
The ACRN Configurator tool acrn_configurator.py provides a web-based
user interface to help you customize your
ACRN configuration. Capabilities:
reads board information from the specified board configuration file
provides a GUI to help you configure and validate scenario and launch configuration files
generates launch scripts for the specified post-launched User VMs
dynamically creates a new scenario configuration and adds or deletes VM settings in it
dynamically creates a new launch configuration and adds or deletes User VM settings in it
The tool guides you to configure ACRN in a particular order, due to dependencies among the different types of configuration files. Here’s an overview of what to expect:
Import the board configuration file that you generated via the Board Inspector tool.
Customize your scenario configuration file by defining hypervisor and VM settings that will be used to build the ACRN hypervisor.
If your scenario has post-launched User VMs, customize launch scripts that the Service VM will use to create the VMs and allocate resources to them dynamically at runtime. Customizing launch scripts involves these steps:
Configure settings for all post-launched User VMs in your scenario and save the configuration in a launch configuration file.
Generate the launch scripts. The ACRN Configurator creates one launch script for each VM defined in the launch configuration file.
Generate a Scenario Configuration File and Launch Scripts
The following steps describe all options in the ACRN Configurator for generating a custom scenario configuration file and launch scripts.
Make sure the development computer is set up and ready to launch the ACRN Configurator, according to Generate a Scenario Configuration File and Launch Scripts in the Getting Started Guide.
Launch the ACRN Configurator. This example assumes the tool is in the
~/acrn-work/directory. Feel free to modify the command as needed.python3 ~/acrn-work/acrn-hypervisor/misc/config_tools/config_app/acrn_configurator.py
Your web browser should open the website http://127.0.0.1:5001/ automatically, or you may need to visit this website manually. The ACRN Configurator is supported on Chrome and Firefox.
Click the Import Board XML button and browse to the board configuration file that you generated via the Board Inspector. After the file is uploaded, make sure the board name is selected in the Board info drop-down list and the board information appears.
Start the scenario configuration process by selecting an option from the Scenario Settings menu on the top banner of the UI or by importing a scenario configuration file via the Import XML button. The four options are described below:
Click Create a new scenario from the Scenario Settings menu to dynamically create a new scenario configuration for the current board.
Click Load a default scenario from the Scenario Settings menu to select a predefined scenario configuration.
Click the Scenario Settings menu and select a scenario from the list under scenario setting list.

Click the Import XML button to import a customized scenario configuration file. The file must be one that was written for the current board. Any mismatch in the board name and the one found in the scenario configuration file you are trying to import will lead to an error message.
When the scenario configuration file is available for editing, the configurable items appear below the Scenario Setting row. You may need to scroll down to see them. Example:
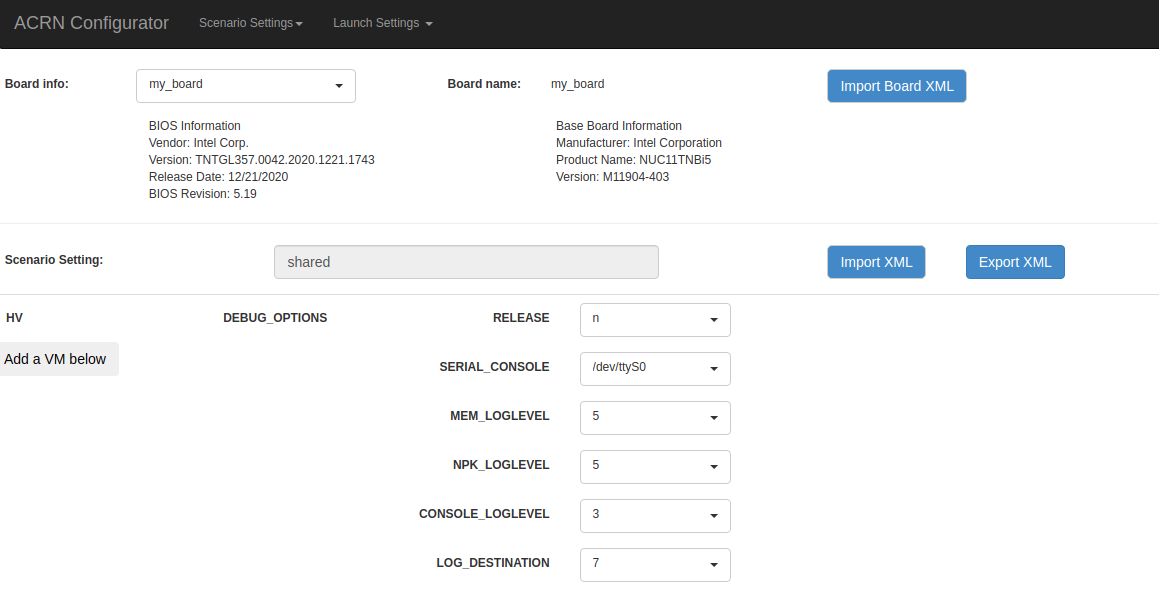
You can edit these items directly in the text boxes, or you can choose single or even multiple items from the drop-down list.
Read-only items are marked as gray.
Hover the mouse cursor over the item to see the description.
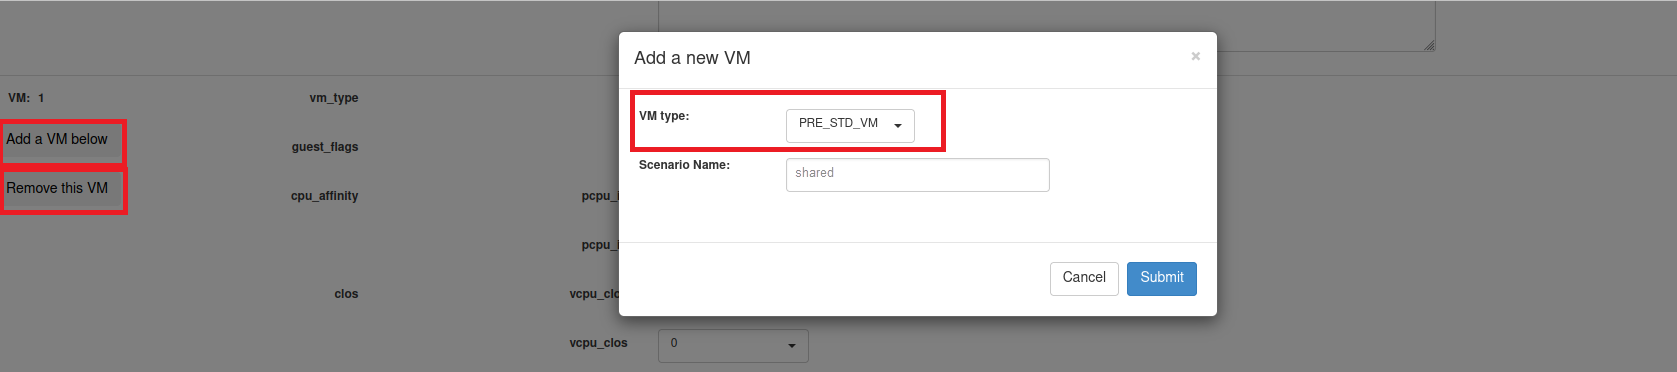
Add or delete VMs:
Click Add a VM below in a VM’s settings, and then select a VM type to add a new VM under the current VM.
Click Remove this VM in a VM’s settings to remove the VM from the scenario.
When a VM is added or removed, the ACRN Configurator reassigns the VM IDs for the remaining VMs by the order of pre-launched User VMs, Service VM, and post-launched User VMs.
Click Export XML to save the scenario configuration file. A dialog box appears, enabling you to save the file to a specific folder by inputting the absolute path to this folder. If you don’t specify a path, the file will be saved to the default folder:
acrn-hypervisor/../user_config/<board name>.Before saving the scenario configuration file, the Configurator validates the configurable items. If errors exist, the Configurator lists all incorrectly configured items and shows the errors. Example:

After the scenario is saved, the page automatically displays the saved scenario configuration file.
To delete a scenario configuration file, click Export XML > Remove. The Configurator will delete the loaded file, even if you change the name of the file in the dialog box.
If your scenario has post-launched User VMs, continue to the next step to create launch scripts for those VMs. If your scenario doesn’t have post-launched User VMs, you can skip to the final step to close the tool.
Start the launch script configuration process by selecting an option from the Launch Settings menu on the top banner of the UI or by importing a launch configuration file via the Import XML button. The four options are described below:
Click Create a new launch script from the Launch Settings menu to dynamically create a new launch configuration for the current board.
Click Load a default launch script from the Launch Settings menu to select a predefined launch configuration.
Click the Launch Settings menu and select a launch configuration from the list under launch setting list.

Click the Import XML button to import a customized launch configuration file.
Select a scenario for the current launch configuration from the Select Scenario drop-down box.
When the launch configuration file is available for editing, the configurable items appear below the Launch Setting row. You may need to scroll down to see them. Example:
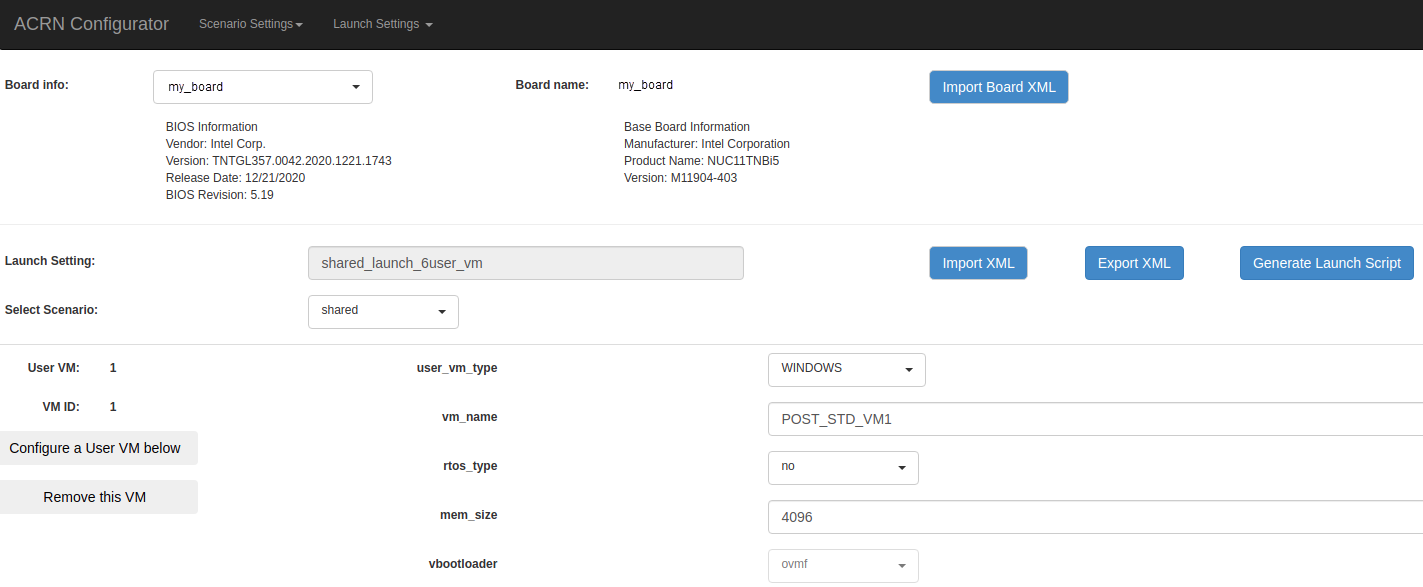
You can edit these items directly in the text boxes, or you can choose single or even multiple items from the drop-down list.
Read-only items are marked as gray.
Hover the mouse cursor over the item to see the description.
Add or remove User VM launch scripts:
Click Configure a User VM below to add a User VM launch script.
Click Remove this VM to remove a User VM launch script.

Click Export XML to save the launch configuration file. A dialog box appears, enabling you to save the file to a specific folder by inputting the absolute path to this folder. If you don’t specify a path, the file will be saved to the default folder:
acrn-hypervisor/../user_config/<board name>.Before saving the launch configuration file, the Configurator validates the configurable items. If errors exist, the Configurator lists all incorrectly configured items and shows the errors.
To delete a launch configuration file, click Export XML > Remove. The Configurator will delete the loaded file, even if you change the name of the file in the dialog box.
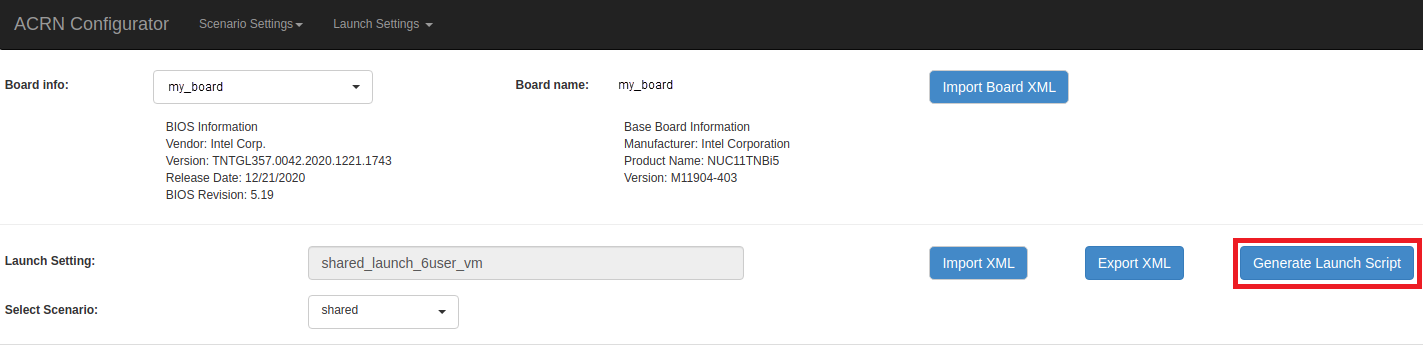
Click Generate Launch Script to save the current launch configuration and then generate a launch script for each VM defined in the launch configuration.
Confirm that the launch scripts appear in the
<board name>/outputdirectory.When you are done using the tool, close the browser and press CTRL + C to terminate the
acrn_configurator.pyprogram running in the terminal window.