Enable Secure Boot in the Clear Linux User VM
Prerequisites
Validated versions
- Clear Linux version: 31080
- ACRN-hypervisor tag: v1.3
- ACRN-Kernel(Service VM kernel): 4.19.73-92.iot-lts2018-sos
- OVMF version: v1.3
Prepare keys (PK/KEK/DB)
Generate keys
For formal case, key generation and management can be referenced by: Ubuntu-KeyGeneration or Windows-secure-boot-key-creation-and-management-guidance.
For testing, the keys can be created on the KBL NUC with these commands:
$ openssl req -new -x509 -newkey rsa:2048 -subj "/CN=test platform key/" -keyout PK.key -out PK.crt -days 3650 -nodes -sha256
$ openssl req -new -x509 -newkey rsa:2048 -subj "/CN=test key-exchange-key/" -keyout KEK.key -out KEK.crt -days 3650 -nodes -sha256
$ openssl req -new -x509 -newkey rsa:2048 -subj "/CN=test signing key/" -keyout db.key -out db.crt -days 3650 -nodes -sha256
$ cert-to-efi-sig-list -g "$(uuidgen)" PK.crt PK.esl
$ sign-efi-sig-list -k PK.key -c PK.crt PK PK.esl PK.auth
$ cert-to-efi-sig-list -g "$(uuidgen)" KEK.crt KEK.esl
$ sign-efi-sig-list -a -k PK.key -c PK.crt KEK KEK.esl KEK.auth
$ cert-to-efi-sig-list -g "$(uuidgen)" db.crt db.esl
$ sign-efi-sig-list -a -k KEK.key -c KEK.crt db db.esl db.auth
$ openssl x509 -outform DER -in PK.crt -out PK.der
$ openssl x509 -outform DER -in KEK.crt -out KEK.der
$ openssl x509 -outform DER -in db.crt -out db.der
The keys to be enrolled in UEFI BIOS: PK.der, KEK.der, db.der The keys to sign bootloader or kernel: db.key, db.crt
Create virtual disk to hold the keys
Follow these commands to create a virtual disk and copy the keys generated above:
$ sudo dd if=/dev/zero of=$PWD/hdd_keys.img bs=1024 count=10240
$ mkfs.msdos hdd_keys.img
$ sudo losetup -D
$ sudo losetup -f -P --show $PWD/hdd_keys.img
$ sudo mount /dev/loop0 /mnt
$ sudo cp PK.der KEK.der db.der /mnt
$ sync
$ sudo umount /mnt
$ sudo losetup -d /dev/loop0
Enroll keys in OVMF
Customize the
launch_uos.shscript to boot with the virtual disk that contains the keys for enrollment:$ cp /usr/share/acrn/samples/nuc/launch_uos.sh ./launch_virtual_disk.sh $ sudo vim ./launch_virtual_disk.sh acrn-dm -A -m $mem_size -c $2 -s 0:0,hostbridge \ -s 2,pci-gvt -G "$3" \ -l com1,stdio \ -s 5,virtio-console,@pty:pty_port \ -s 6,virtio-hyper_dmabuf \ -s 3,virtio-blk,./hdd_keys.img \ -s 4,virtio-net,tap0 \ -s 7,virtio-rnd \ --ovmf w,/usr/share/acrn/bios/OVMF.fd \ $pm_channel $pm_by_vuart $pm_vuart_node \ $logger_setting \ --mac_seed $mac_seed \ $vm_name }
Launch the customized script to enroll keys:
$ sudo ./launch_virtual_disk.sh
Type
exitcommand in UEFI shell.
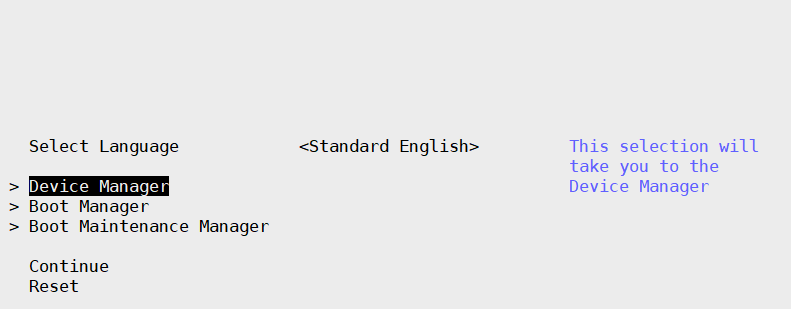
Select Device Manager –> Secure Boot Configuration.


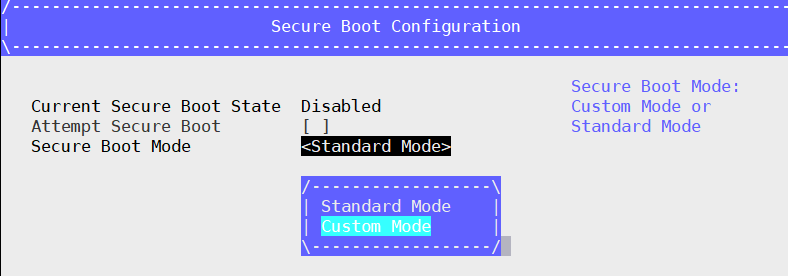
Select Secure Boot Mode –> Custom Mode –> Custom Secure Boot Options.

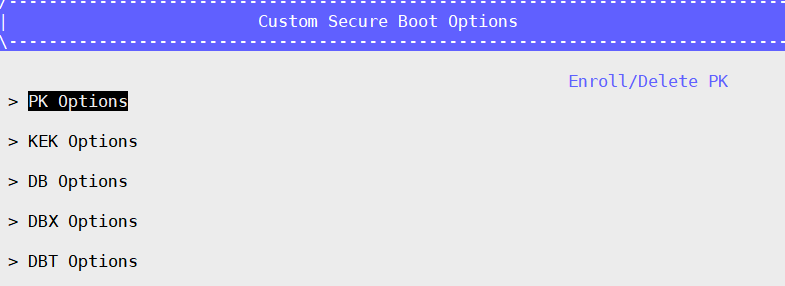
Enroll Keys:
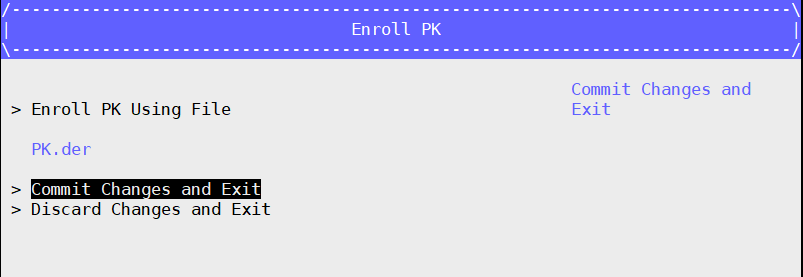
- Enroll PK: Select PK Options –> Enroll PK –> Enroll PK Using File –> VOLUME – PK.der –> Commit Changes and Exit
- Enroll KEK(similar with PK): Select KEK Options –> Enroll KEK –> Enroll KEK Using File –> VOLUME –> KEK.der –> Commit Changes and Exit
- Enroll Signatures(similar with PK): Select DB Options –> Enroll Signature –> Enroll Signature Using File –> VOLUME –> db.der –> Commit Changes and Exit
Example for enrolling the PK file:


Press ESC to go back to the Secure Boot Configuration interface.
Now the Current Secure Boot State is Enabled and Attempt Secure Boot option is selected.
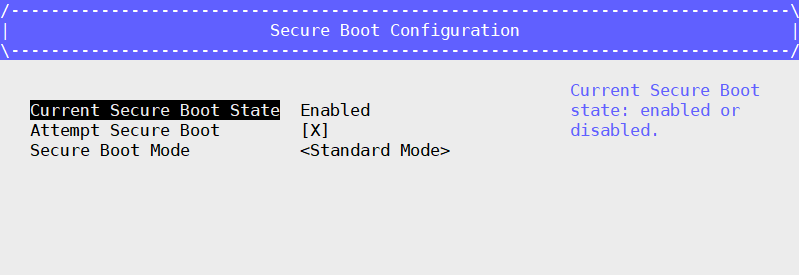
Go back to UEFI GUI main interface and select Reset to perform a formal reset/shutdown to ensure the key enrollment is taking effect in the next boot.

Type
reset -sto shutdown the guest in the UEFI shell.
Sign the Clear Linux image
Follow these commands to sign the Clear Linux VM binaries.
Download and decompress the Clear Linux image:
$ wget https://download.clearlinux.org/releases/31080/clear/clear-31080-kvm.img.xz
$ unxz clear-31080-kvm.img.xz
Download the script to sign image:
$ wget https://raw.githubusercontent.com/projectacrn/acrn-hypervisor/master/doc/scripts/sign_image.sh
Run the script to sign image.
$ sudo sh sign_image.sh clear-31080-kvm.img db.key db.crt
/mnt/EFI/BOOT/BOOTX64.EFI
warning: data remaining[93184 vs 105830]: gaps between PE/COFF sections?
warning: data remaining[93184 vs 105832]: gaps between PE/COFF sections?
Signing Unsigned original image
sign /mnt/EFI/BOOT/BOOTX64.EFI succeed
/mnt/EFI/org.clearlinux/bootloaderx64.efi
warning: data remaining[1065472 vs 1196031]: gaps between PE/COFF sections?
warning: data remaining[1065472 vs 1196032]: gaps between PE/COFF sections?
Signing Unsigned original image
sign /mnt/EFI/org.clearlinux/bootloaderx64.efi succeed
/mnt/EFI/org.clearlinux/kernel-org.clearlinux.kvm.5.2.17-389
Signing Unsigned original image
sign /mnt/EFI/org.clearlinux/kernel-org.clearlinux.kvm.5.2.17-389 succeed
/mnt/EFI/org.clearlinux/loaderx64.efi
warning: data remaining[93184 vs 105830]: gaps between PE/COFF sections?
warning: data remaining[93184 vs 105832]: gaps between PE/COFF sections?
Signing Unsigned original image
sign /mnt/EFI/org.clearlinux/loaderx64.efi succeed
You will get the signed Clear Linux image:
clear-31080-kvm.img.signed
Boot Clear Linux signed image
Modify the
launch_uos.shscript to use the signed image.$ sudo vim /usr/share/acrn/samples/nuc/launch_uos.sh acrn-dm -A -m $mem_size -c $2 -s 0:0,hostbridge \ -s 2,pci-gvt -G "$3" \ -l com1,stdio \ -s 5,virtio-console,@pty:pty_port \ -s 6,virtio-hyper_dmabuf \ -s 3,virtio-blk,./clear-31080-kvm.img.signed \ -s 4,virtio-net,tap0 \ -s 7,virtio-rnd \ --ovmf /usr/share/acrn/bios/OVMF.fd \ $pm_channel $pm_by_vuart $pm_vuart_node \ $logger_setting \ --mac_seed $mac_seed \ $vm_name }
You may see the UEFI shell boots by default.
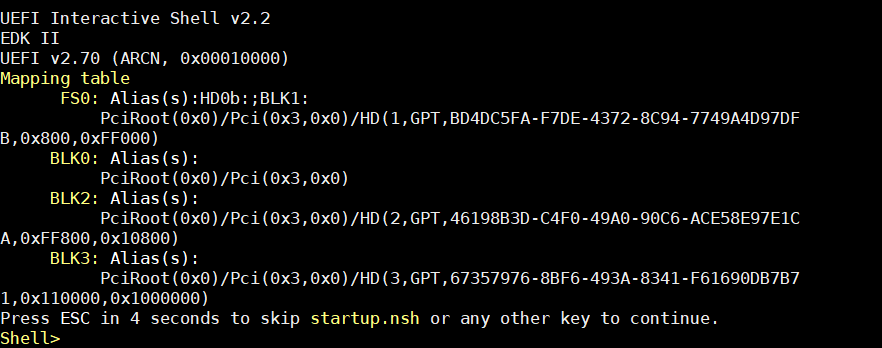
Type
exitto enter Bios configuration.Navigate to the Boot Manager and select UEFI Misc Device to boot the signed Clear Linux image.
Login as root and use
dmesgto check the secure boot status on the User VM.root@clr-763e953a125f4bda94dd2efbab77f776 ~ # dmesg | grep Secure [ 0.001330] Secure boot enabled