Run Ubuntu as the User VM OS
Prerequisites
This tutorial assumes you have already set up the ACRN Service VM on your target system following the instructions in the Getting Started Guide.
Install these KVM tools on your development system:
sudo apt install qemu-kvm libvirt-clients libvirt-daemon-system bridge-utils virt-manager ovmf
Validated Versions
Ubuntu version: 20.04
ACRN hypervisor tag: v3.0
Service VM Kernel version: release_3.0
Build the Ubuntu KVM Image
This tutorial uses the Ubuntu 20.04 desktop ISO as the base image.
Download the Ubuntu 20.04 desktop ISO on your development machine:
Install Ubuntu via the virt-manager tool:
sudo virt-manager
Verify that you can see the main menu as shown in Figure 13 below.
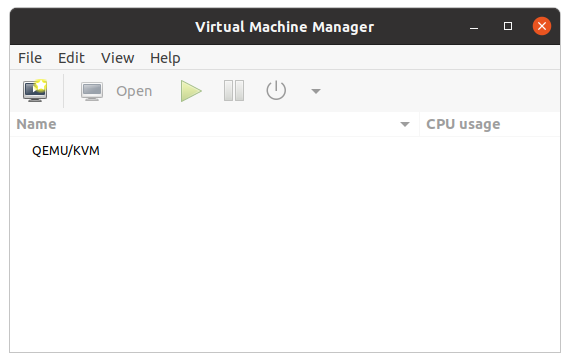
Figure 13 Virtual Machine Manager
Right-click QEMU/KVM and select New.
Choose Local install media (ISO image or CD-ROM) and then click Forward.
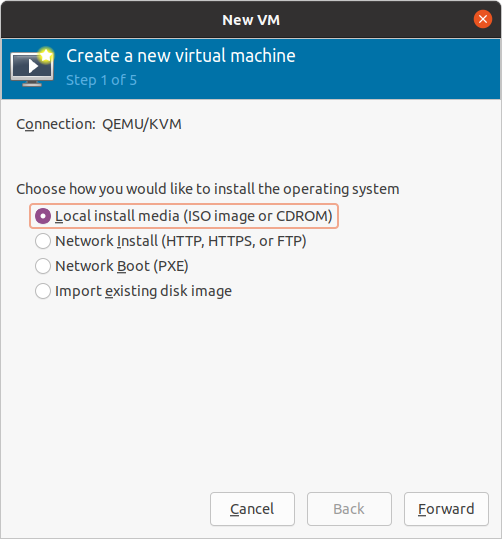
Figure 14 Choosing Local install media
A Create a new virtual machine box displays. Click Browse and select the Ubuntu ISO file that you downloaded earlier. If not already auto selected, choose the OS type: Linux, Version: Ubuntu 20.04 LTS and then click Forward.
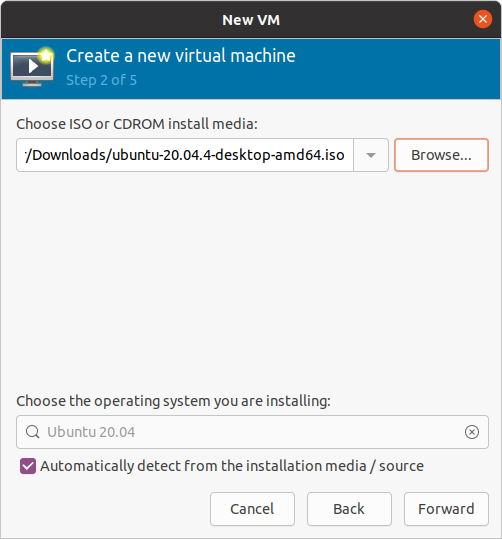
Figure 15 Select Ubuntu ISO file previously downloaded
Choose Enable storage and Create a disk image for the virtual machine. Set the storage to 20 GB or more if necessary and click Forward.
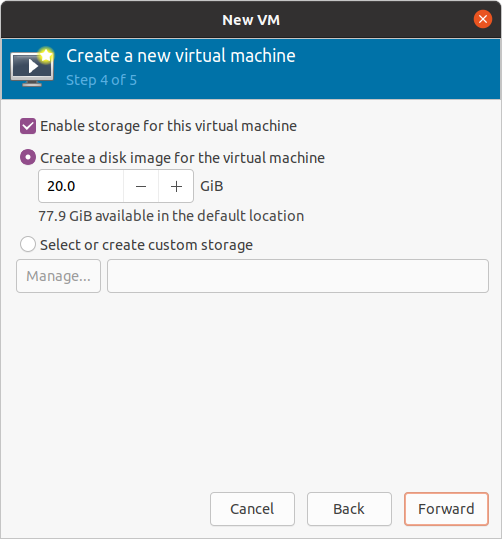
Figure 16 Select VM disk storage
Rename the image if you desire. Check the customize configuration before install option before you finish all stages.
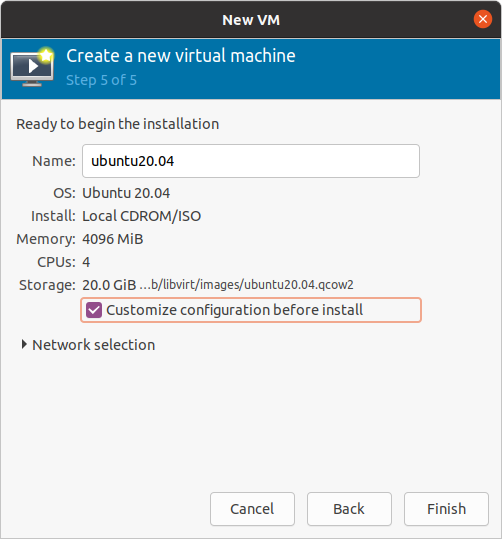
Figure 17 Ready to customize image
Verify the Firmware and Chipset settings are as shown in this Overview screen:
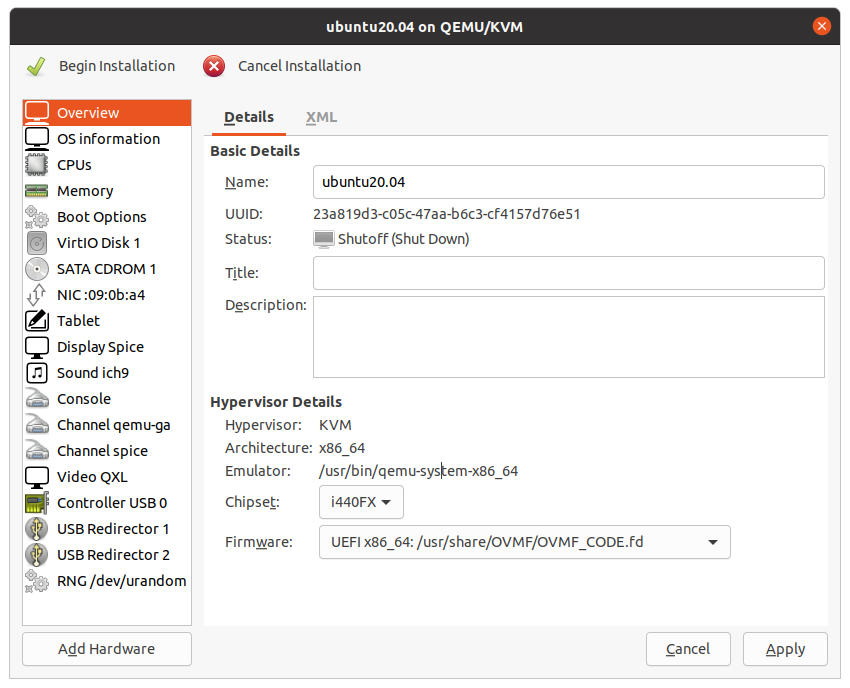
Figure 18 Ready to begin installation
Click Apply and Begin Installation (in the top left corner). Complete the normal Ubuntu installation within the QEMU emulator. Verify that you have set up the disk partition as follows:
/dev/vda1: EFI System Partition
/dev/vda2: File System Partition
Upon installation completion, click Restart Now to make sure the Ubuntu OS boots successfully. Save the QEMU state and exit.
The KVM image is created in the
/var/lib/libvirt/imagesfolder. Convert theqcow2format toimgas the root user:cd ~ && mkdir ubuntu_images && cd ubuntu_images sudo qemu-img convert -f qcow2 -O raw /var/lib/libvirt/images/ubuntu20.04.qcow2 ubuntu_uservm.img
Launch the Ubuntu Image as the User VM
In the Getting Started Guide, we used the ACRN configurator to create a scenario with a Service VM and an Ubuntu ISO image for the post-launched User VM. We can use that same scenario with a slight edit for the User VM image name by changing the file name in the Virtio block device for the post-launched User VM.
Change the virtio block device to use the new Ubuntu image we created using KVM above:
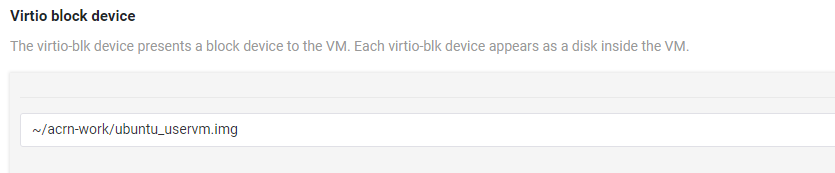
Figure 19 Update virtio block device with image location
Then save this new configuration and write out the updated launch script.
Copy the
ubuntu_uservm.imgand the updated launch script from the development system to your target system. For example, if the development and target systems are on the same network, you could usescp:scp ~/ubuntu_images/ubuntu_uservm.img ~/acrn-work/MyConfiguration/launch_user_vm_id1.sh user_name@ip_address:~/acrn-work/
On the target system, launch the Ubuntu User VM after logging in to the Service VM:
cd ~/acrn-work
sudo launch_user_vm_id1.sh