ACRN Configurator Tool
This guide describes all features and uses of the tool.
About the ACRN Configurator Tool
The ACRN Configurator provides a user interface to help you customize your ACRN configuration. Capabilities:
Reads board information from the board configuration file generated by the Board Inspector Tool
Helps you configure a scenario of hypervisor and VM settings
Generates a scenario configuration file that stores the configured settings in XML format
Generates a launch script for each post-launched User VM
Prerequisites
This guide assumes you have a board configuration file and have successfully launched the ACRN Configurator. For steps, see the following Getting Started Guide sections:
The above Getting Started Guide steps use a prebuilt Debian package to install the ACRN Configurator. Build ACRN Configurator From Source Code describes how to build the Debian package.
Scenario Error Checking
The configurator includes many validation checks that verify input values, ensure the consistency of configuration options, and interactions between options.
Simple data validation checks on values are detected immediately with red text indicating the problem, or with an indicator within a data entry field. For example, if you type in a value that is out of range, you’ll see your value crossed out:

If you delete a required value, you’ll see an error message in red text:

More complex checks, including those that look for conflicting settings, are done when you initially open a saved (or newly created) scenario, or when you use the “Save Scenario” button. If problems are detected, the response window from the save action will indicate that problems were found. The Hypervisor or VM tabs will then display an error icon leading you to the configuration option panels where you can resolve the errors. For example, both the Hypervisor and VM1 tabs indicate an option setting problem:
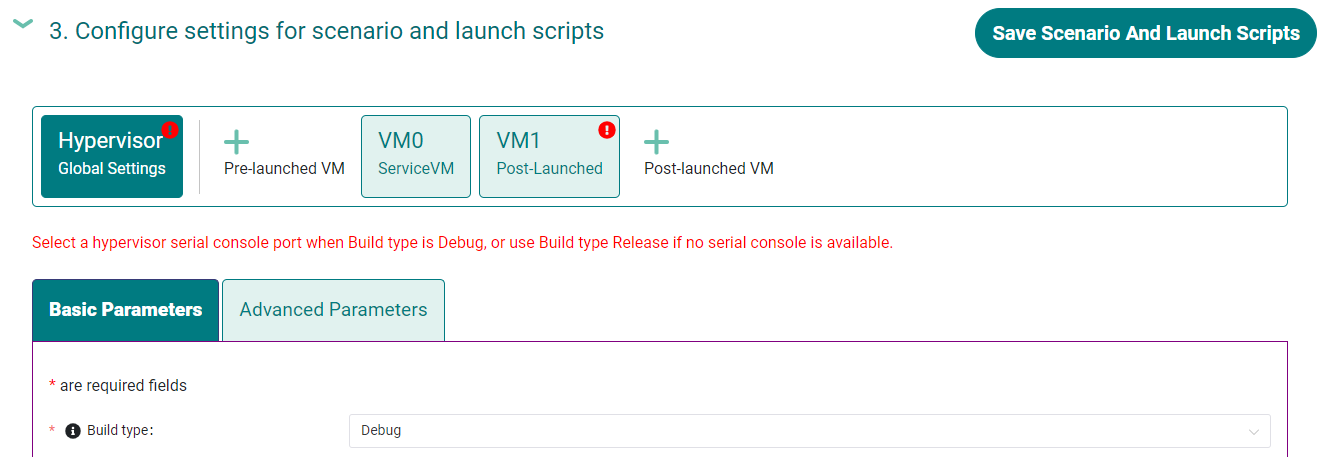
Since we’re on the Hypervisor (Basic Parameters) options, we see the Hypervisor configuration error message. If we click on the VM1 tab, we’ll see what the issues are with that VM’s configuration options:
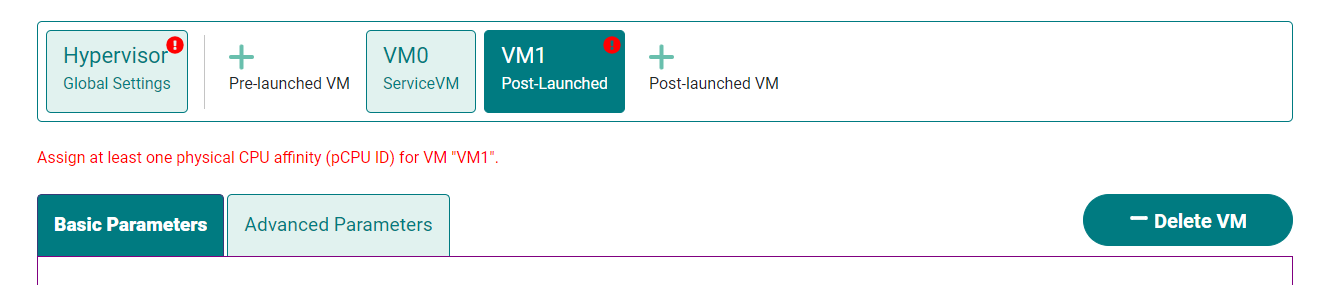
In both cases, you can scroll down to see the specific problem (on either the basic or advanced parameters tab), fix the issues, and then when all issues are resolved, click on the “Save Scenario” button to validate the changes and save the settings. If all issues were resolved, the save scenario response window will indicate no issues were found and all the error indicators will be cleared.
Start with a New or Existing Configuration
When the ACRN Configurator opens, the introduction screen appears.
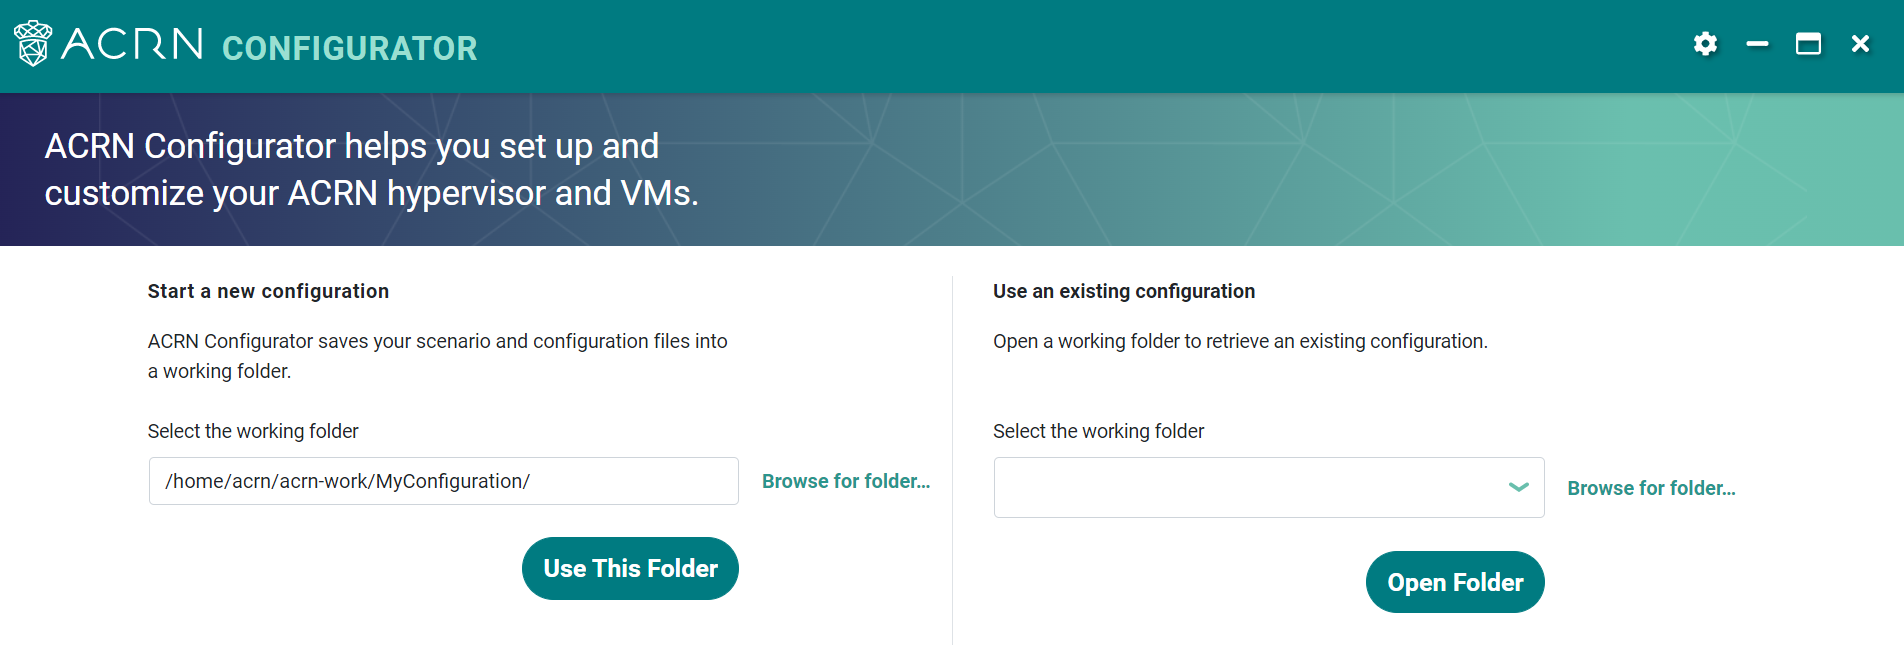
The introduction screen lets you start a new configuration or use an existing one by selecting a working folder.
As described in Introduction to ACRN Configuration, a configuration defines one ACRN instance, and its data is stored in a set of configuration files:
One board configuration file
One scenario configuration file
One launch script per post-launched VM
When you use the ACRN Configurator, it saves these files in the selected working folder.
Each configuration must have a unique working folder. For example, imagine you
want to create three configurations. Perhaps you want to create a configuration
for three different boards, or you have one board but want to create three sets
of hypervisor settings to test on it. You would need to select a different
working folder for each configuration. After you have selected the working
folder in the ACRN Configurator, it saves the configuration files there. The
following figure shows an example file system consisting of a top-level folder,
acrn-work, and a working folder for each configuration, ConfigA,
ConfigB, and ConfigC.

Start a New Configuration
You can start by selecting a new working folder. The tool assumes you are starting from scratch. It checks the folder for existing configuration files, such as a board configuration file, scenario configuration file, and launch scripts. If it finds any, it will delete them.
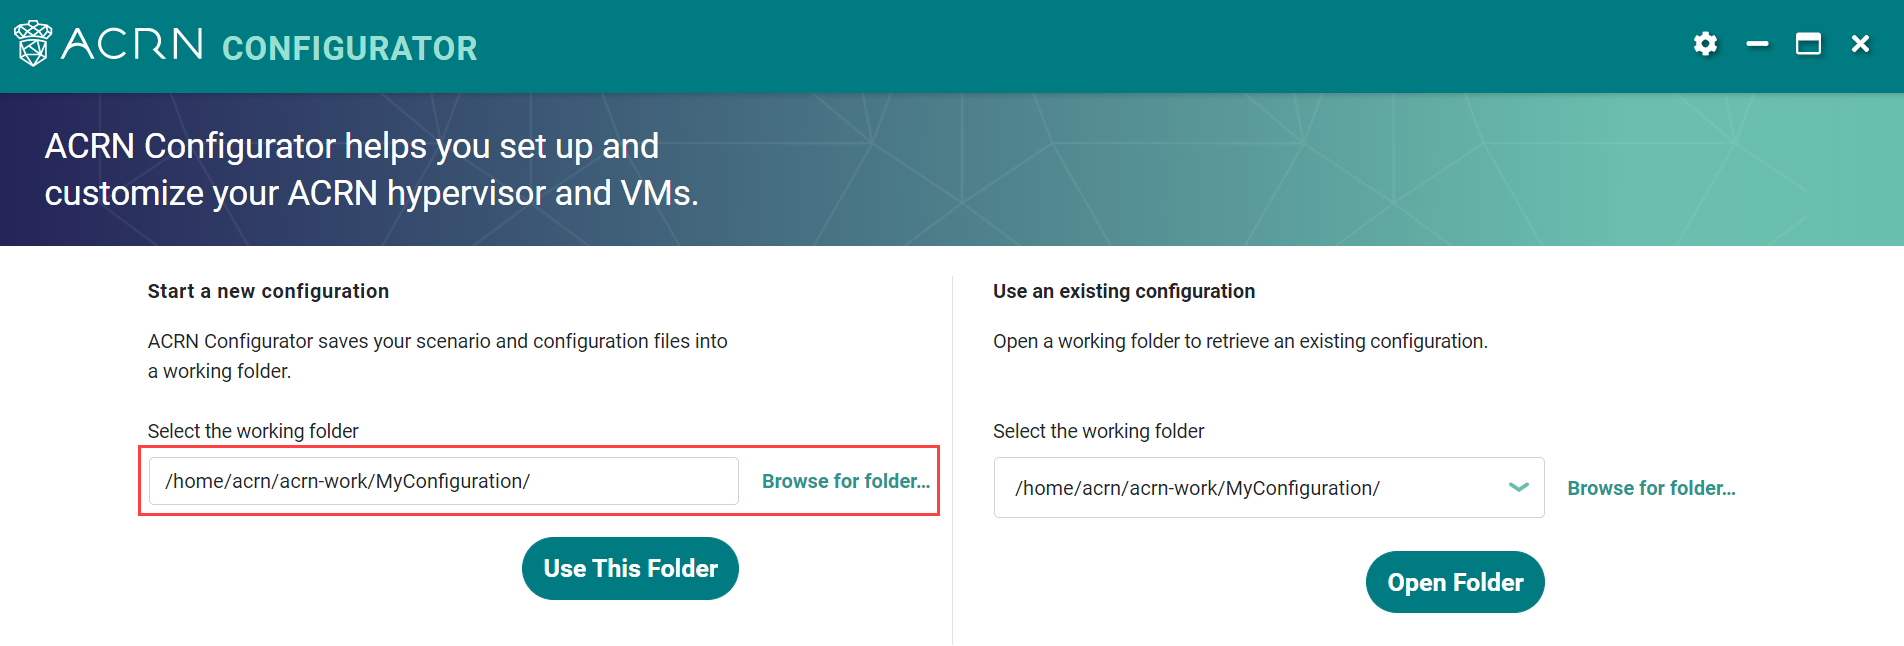
Under Start a new configuration, use the displayed working folder or select a different folder by clicking Browse for folder. Use a folder name that is meaningful to you.
If the folder contains configuration files, the tool displays a message about deleting the files. Click OK to delete the files.
Click Use This Folder.
Use an Existing Configuration
You can use an existing configuration by selecting a working folder that has one or more configuration files in it. For example, the folder can contain a board configuration file alone, or a board configuration file and scenario configuration file. The tool uses the information in the files to populate the UI, so that you can continue working on the configuration where you left off.
Under Use an existing configuration, use the displayed working folder or select a different folder by clicking Browse for folder.
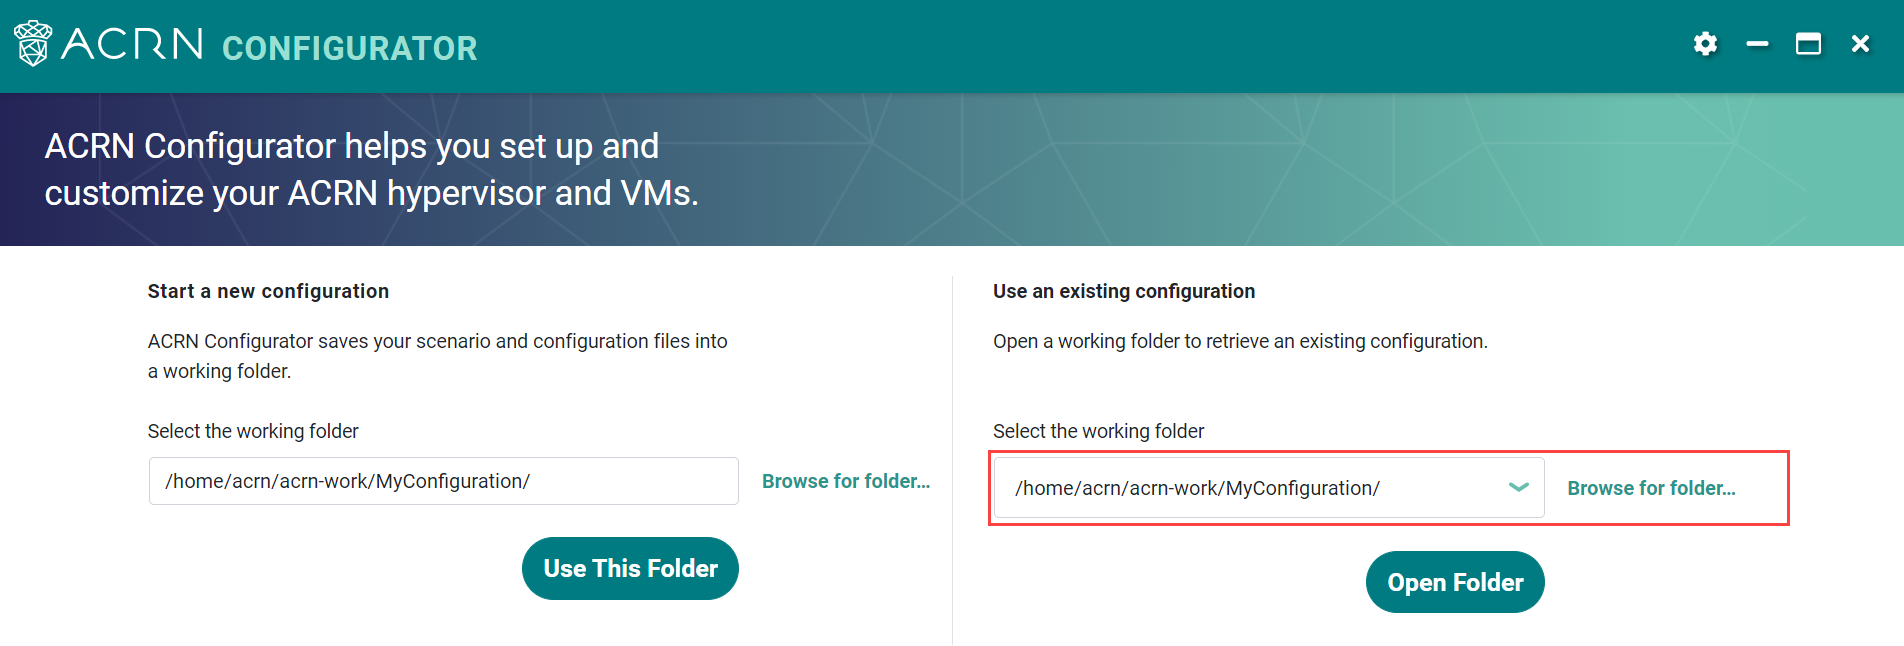
Click Open Folder.
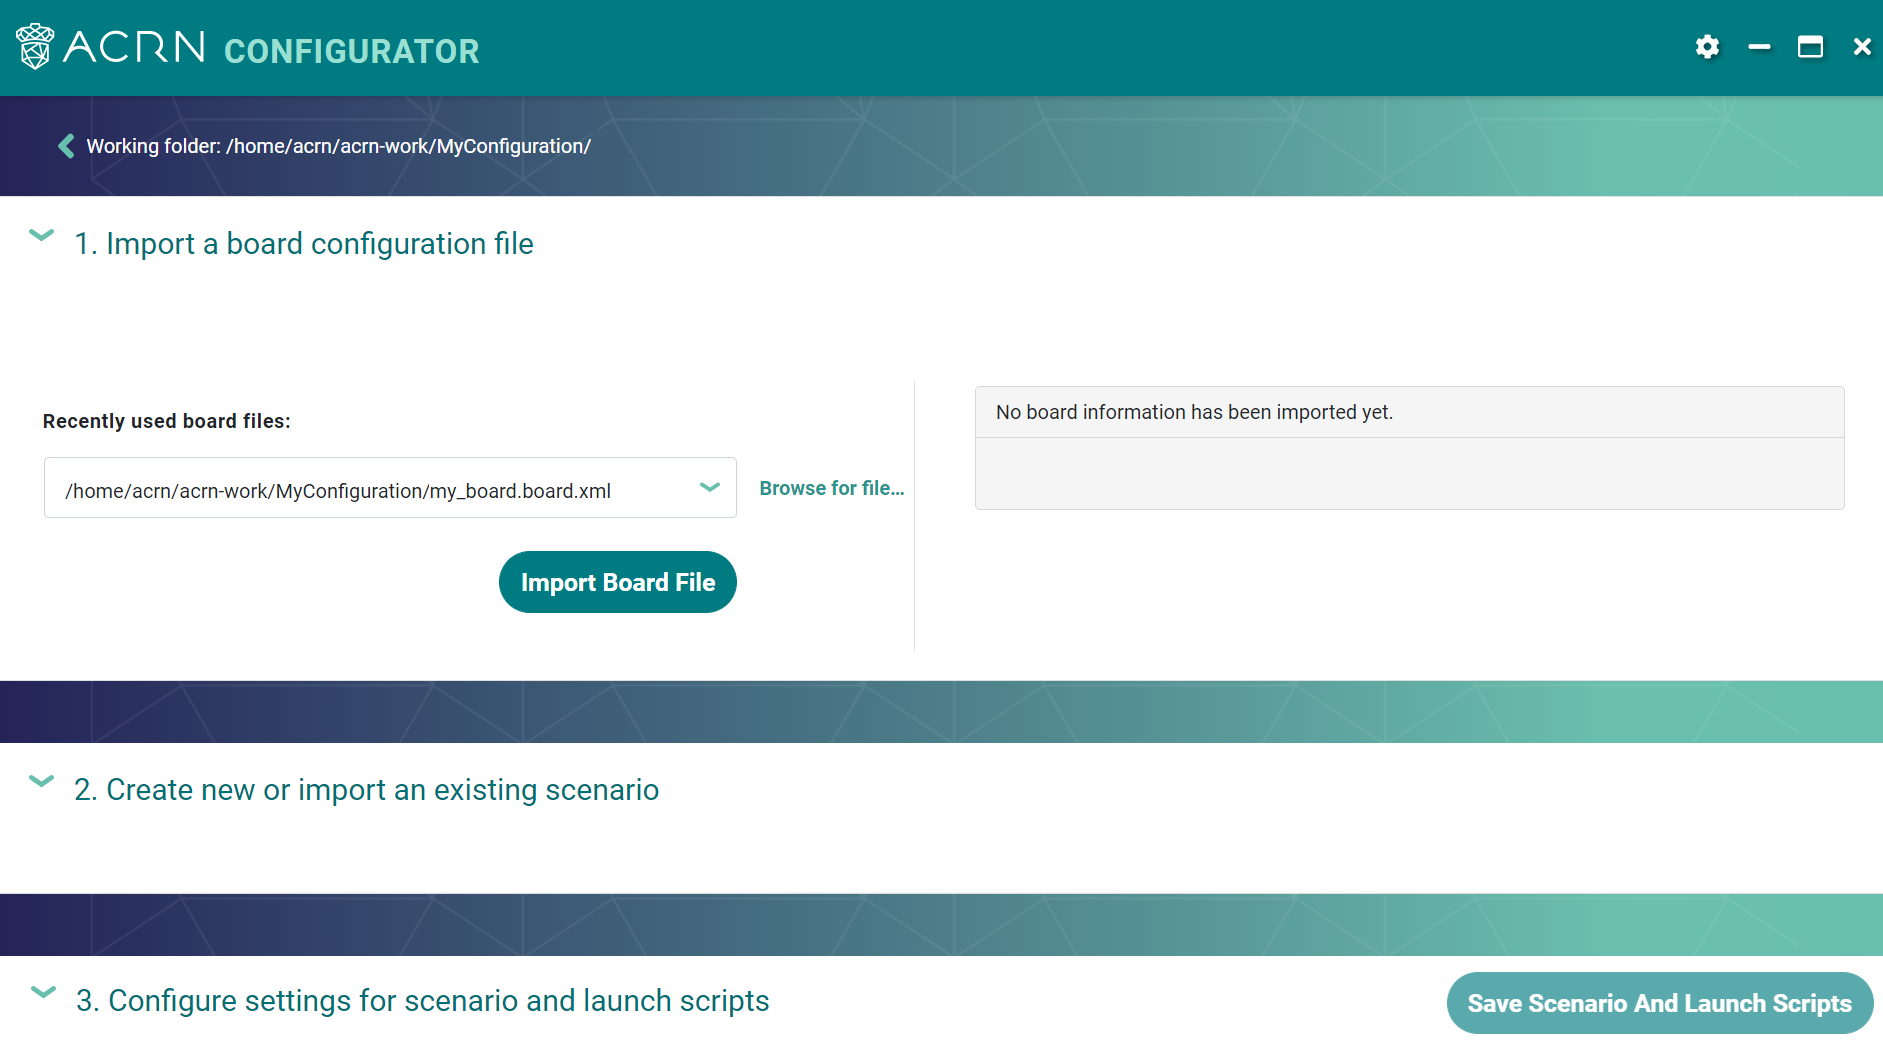
Navigate the Configuration Screen
After you have selected a working folder, the tool opens the second (and final) screen, where you can customize your configuration. The following figure shows an example:
At the top of the screen, the tool shows the selected working folder. To return to the introduction screen, click the arrow next to the working folder path:

The rest of the configuration screen is divided into three panels:
Import a board configuration file
Create new or import an existing scenario
Configure settings for scenario and launch scripts
The panels are labeled 1, 2, and 3 to guide you through the configuration steps. The tool also enforces this order of operation by enabling each panel only after you have completed the preceding panel.
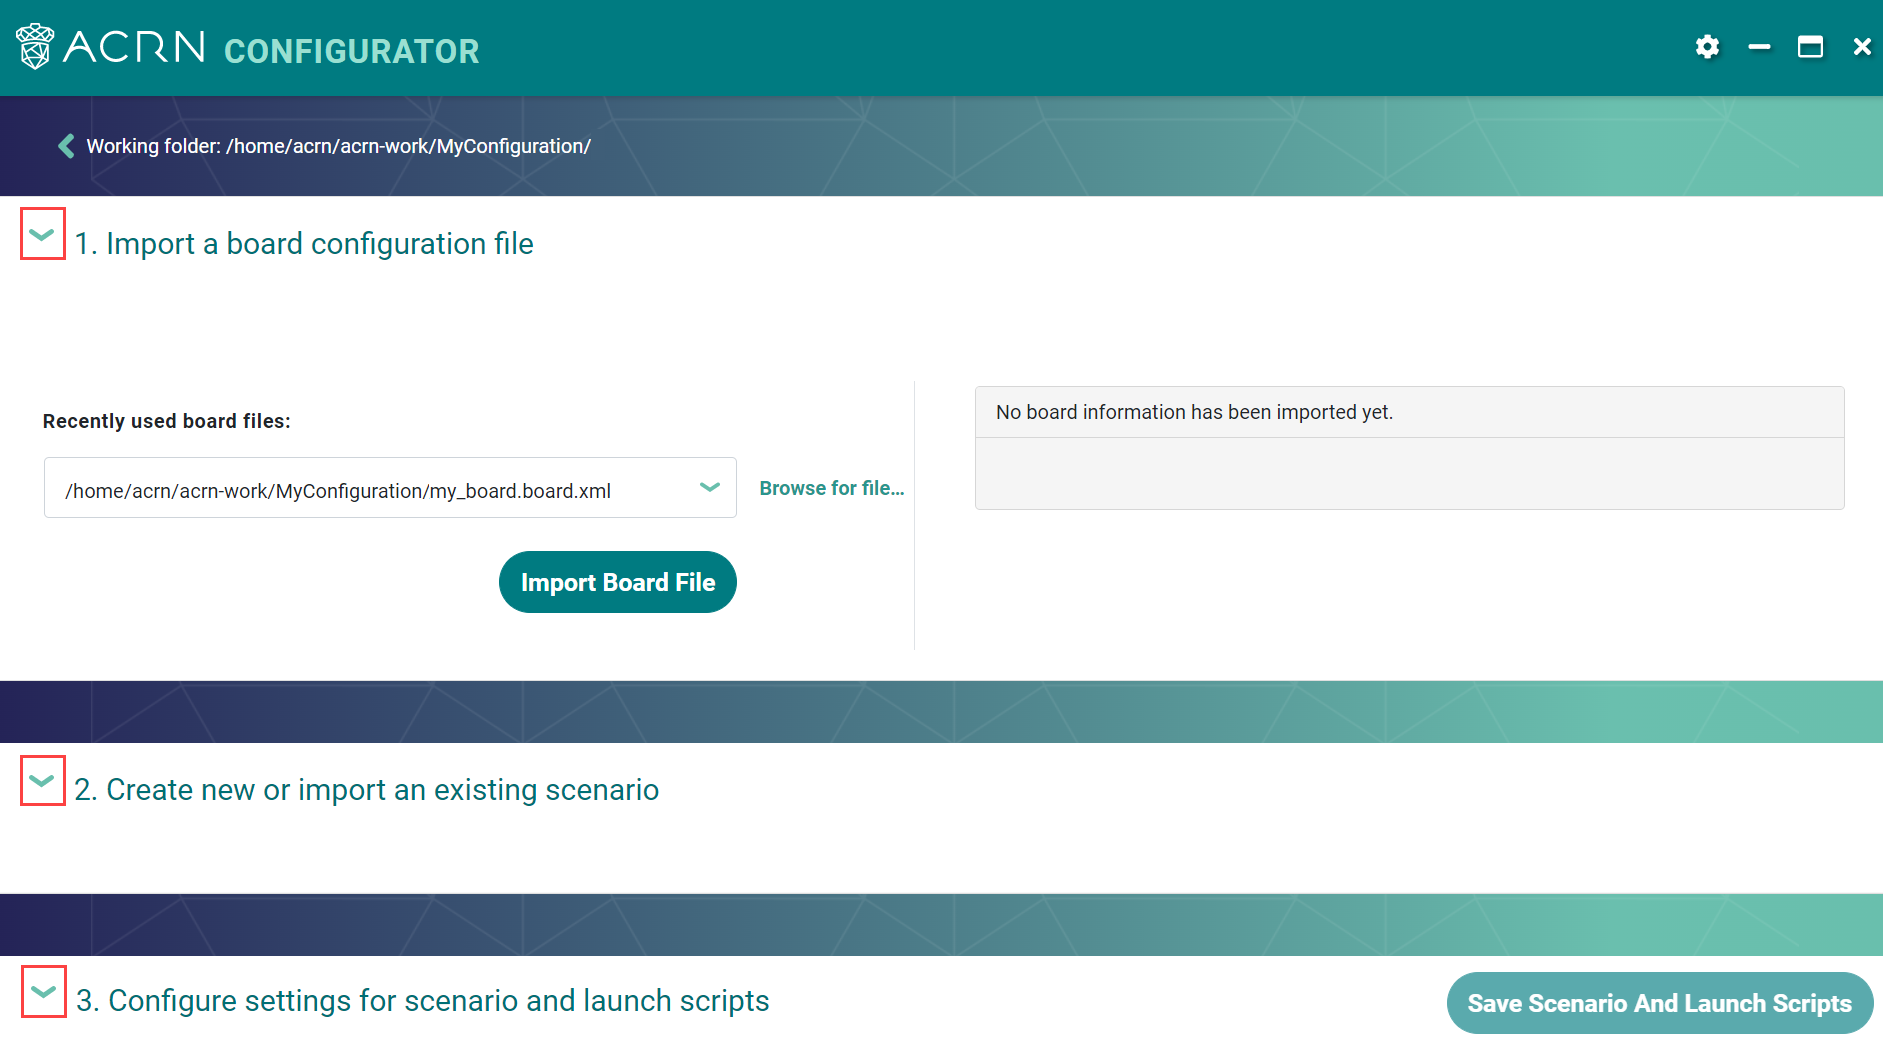
The title bar of each panel has an arrow icon. Click the icon to expand or collapse the panel.
Import a Board Configuration File
The first step in the configuration process is to import the board configuration file generated via the Board Inspector Tool. You can import a board configuration file for the first time, or replace the existing file.
Import a Board Configuration File for the First Time
If the working folder doesn’t have a board configuration file, the tool shows that no board information has been imported yet.
To import a board configuration file for the first time:
Under Import a board configuration file, select a file from the dropdown menu or click Browse for file to select a different file.
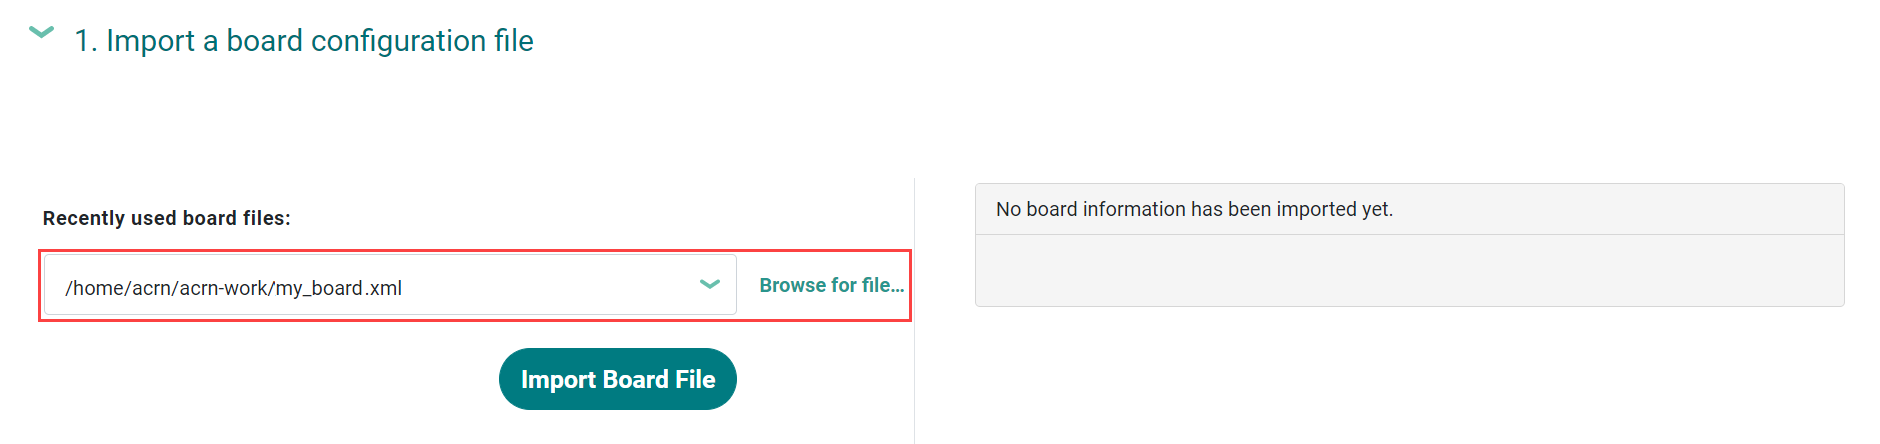
Click Import Board File.
The tool makes a copy of your board configuration file, changes the
file extension to .board.xml, and saves the file in the working folder.
The tool displays the current board information. Example:
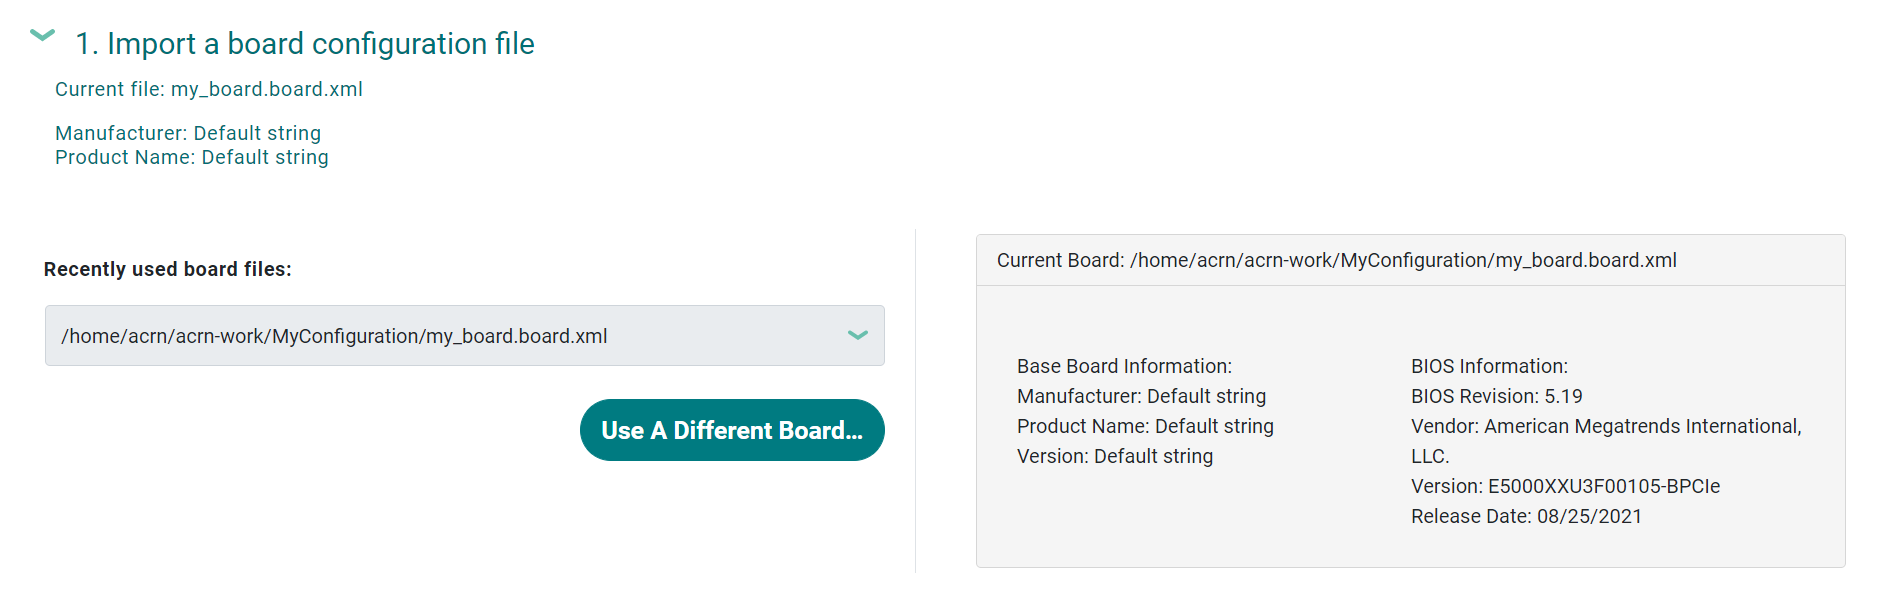
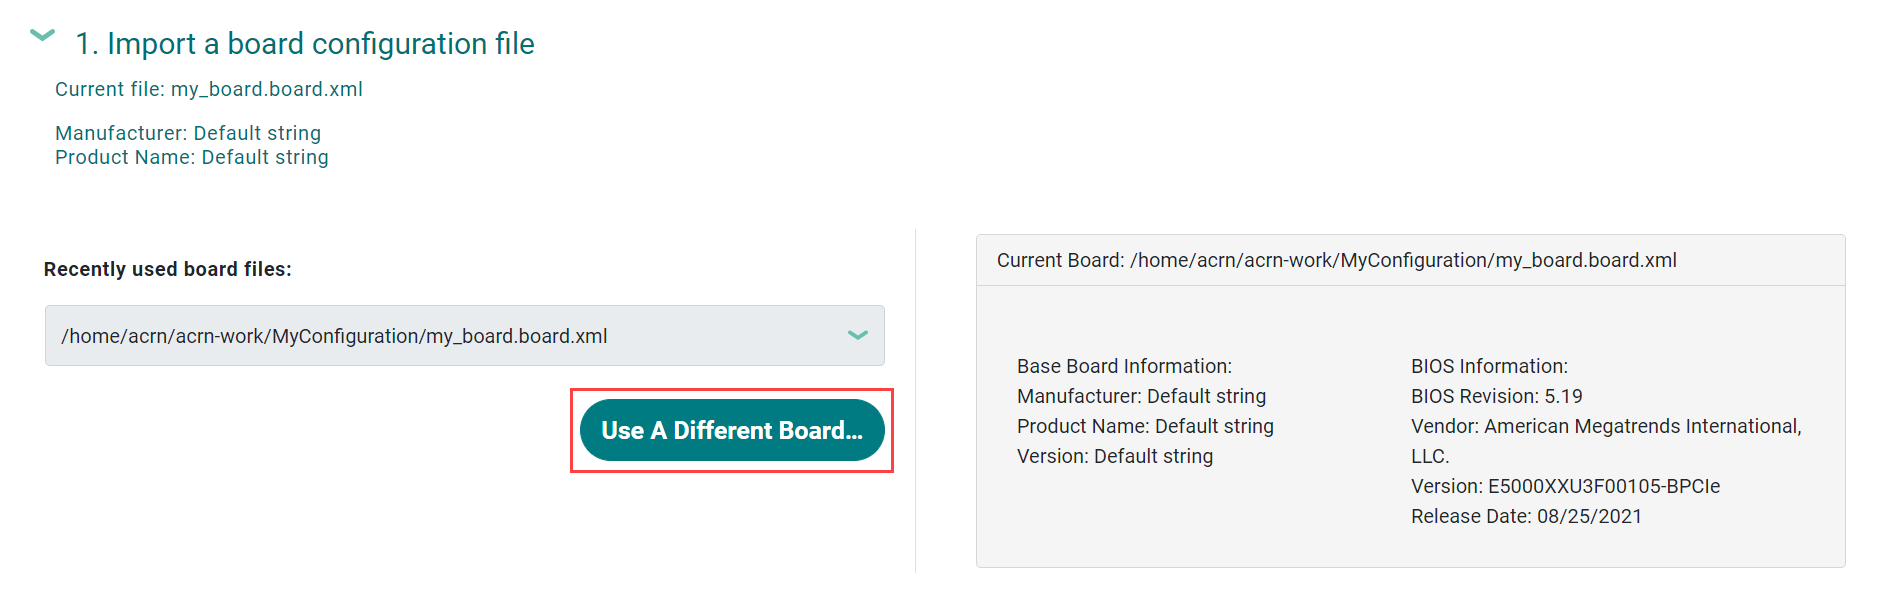
Replace an Existing Board Configuration File
After a board configuration file has been imported, you can choose to replace it at any time. This option is useful, for example, when you need to change your board’s configuration while you are customizing your hypervisor settings. Whenever you change the configuration of your board, you must generate a new board configuration file via the Board Inspector Tool. Examples include changing any BIOS setting such as hyper-threading, adding or removing a physical device, or adding or removing memory. If this happens after you’ve started customizing your hypervisor in the ACRN Configurator, you can import the new board file into your existing configuration and continue editing.
To replace an existing board configuration file:
Under Import a board configuration file, click Use a Different Board.
Browse to the board configuration file and click Open.
The tool displays a warning message about overwriting the existing file. Click Ok to proceed.
The tool replaces the file and displays the new board information.
Create New or Import an Existing Scenario
After importing the board configuration file, the next step is to specify an initial scenario. You can create a new scenario, or import an existing scenario configuration file. In both cases, this step is a starting point for configuring your hypervisor and VMs. Later, you can choose to change the configuration, such as adding or deleting VMs.
Create a Scenario
You can create a scenario by specifying an initial number of VMs.
Under Create new or import an existing scenario, click Create Scenario.
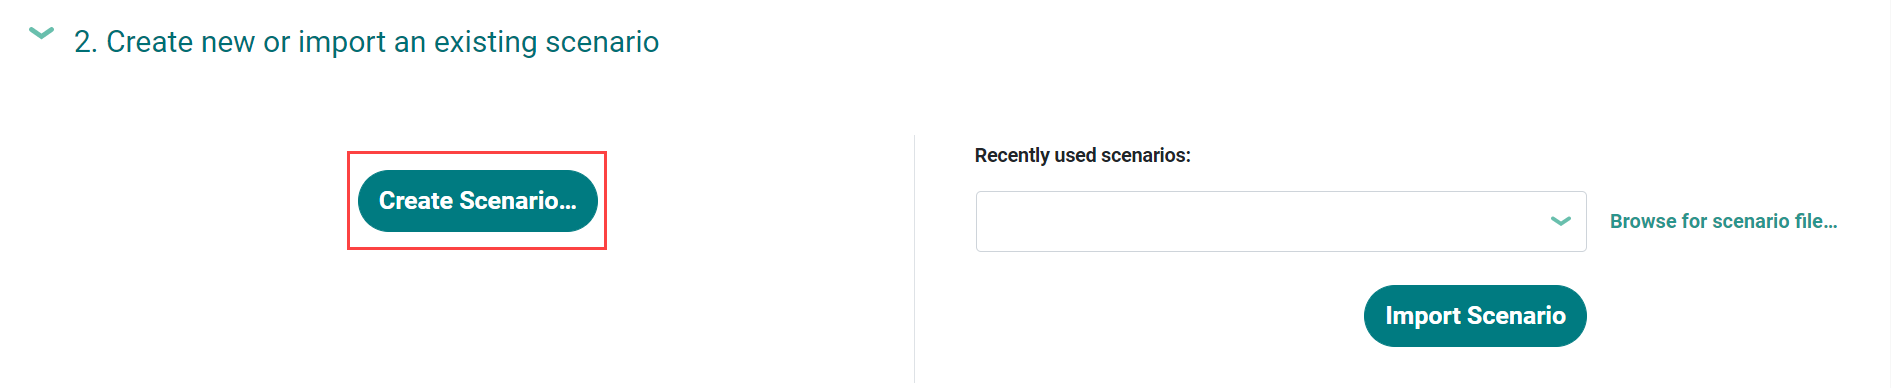
In the dialog box, select a scenario type and number of VMs. The tool enforces dependencies. For example, a scenario with post-launched VMs must have a Service VM, so the tool adds a Service VM and doesn’t allow you to delete it here.

Click Ok.
The tool displays the name of the scenario configuration file, but it doesn’t save it to the working folder until you click Save Scenario And Launch Scripts in the third panel.
Import a Scenario Configuration File
You can import an existing scenario configuration file. The tool uses the information in the file to populate the UI, so that you can continue working on the configuration where you left off.
Due to the strict validation ACRN adopts, scenario configuration files for a former release may not work in the current release unless they are upgraded. Starting from v3.0, upgrade an older scenario XML per the steps in Upgrading ACRN Configurations to Recent Releases then import the upgraded file into the tool in the next step.
Under Create new or import an existing scenario, go to the right side of the screen and select a scenario configuration file from the dropdown menu or click Browse for scenario file to select a different file.
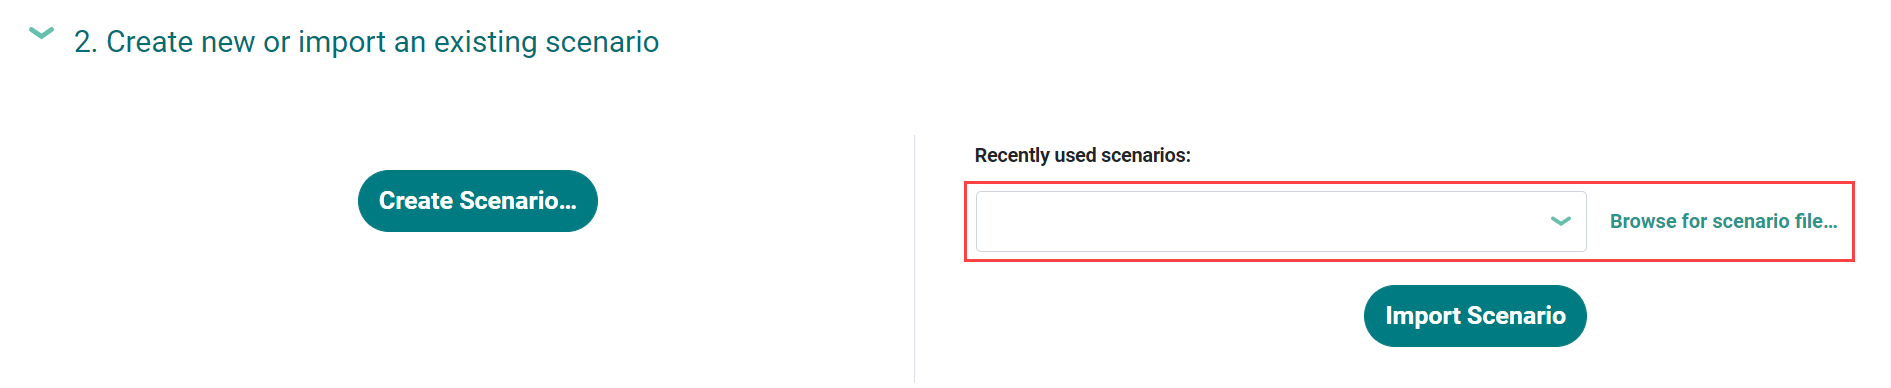
Click Import Scenario.
The tool displays the name of the scenario configuration file, but it doesn’t save it to the working folder until you click Save Scenario And Launch Scripts in the third panel.
Configure Settings for Scenario and Launch Scripts
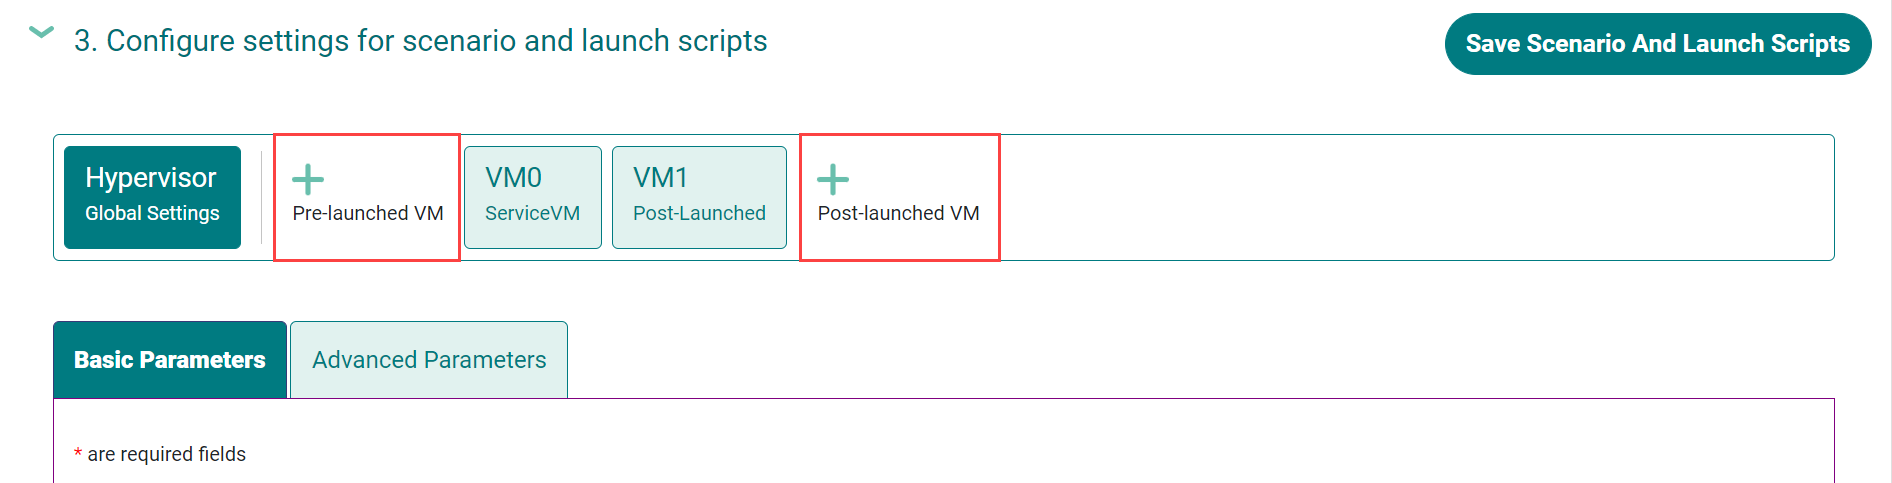
After creating a scenario or importing an existing one, you can configure hypervisor and VM parameters, as well as add or delete VMs.
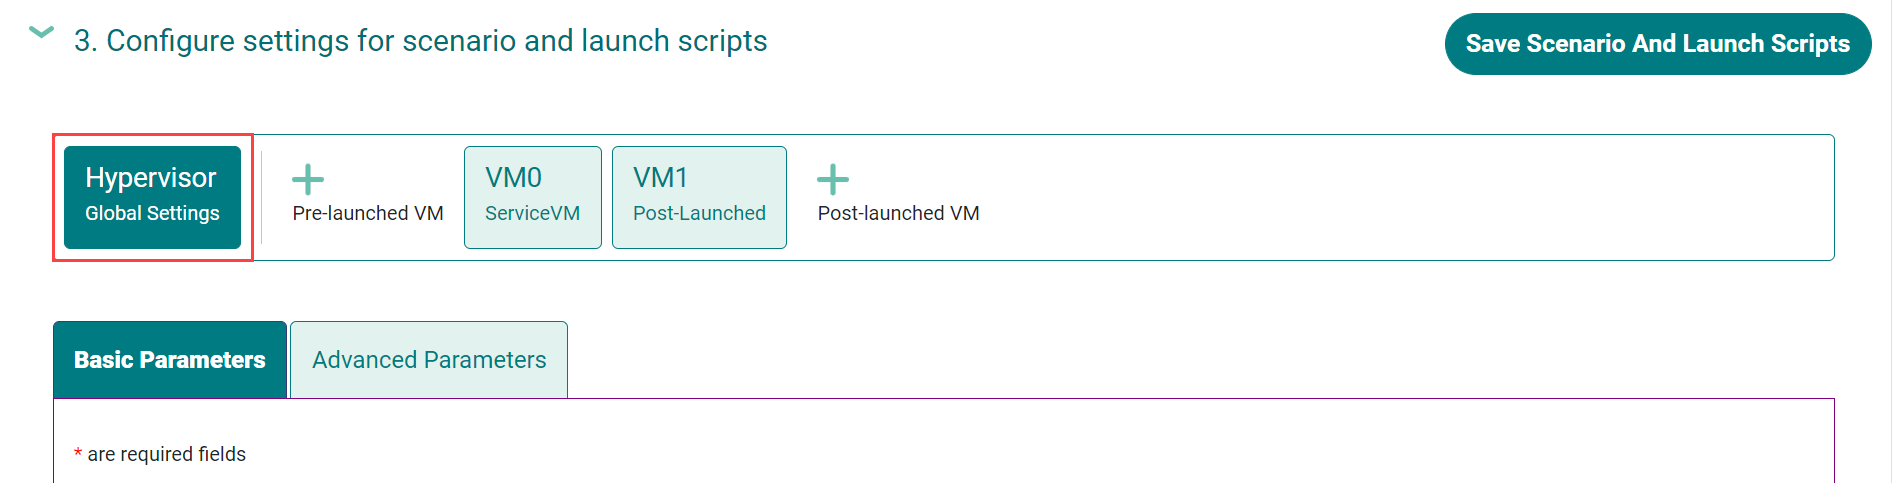
Configure the Hypervisor and VM Parameters
Click the hypervisor or VM tab in the selector menu. The selected tab is darker in color.
Click the Basic Parameters tab or Advanced Parameters tab and make updates. To learn more about each parameter, hover over the
 icon for a short
description or go to Scenario Configuration Options for documentation.
icon for a short
description or go to Scenario Configuration Options for documentation.
Basic parameters are generally defined as:
Parameters that are necessary for ACRN configuration, compilation, and execution.
Parameters that are common for software like ACRN.
Parameters that are anticipated to be commonly used for typical ACRN use cases.
Advanced parameters are generally defined as:
Parameters that are optional for ACRN configuration, compilation, and execution. Default values cover most use cases.
Parameters that are used for fine-grained tuning, such as reducing code lines or optimizing performance.
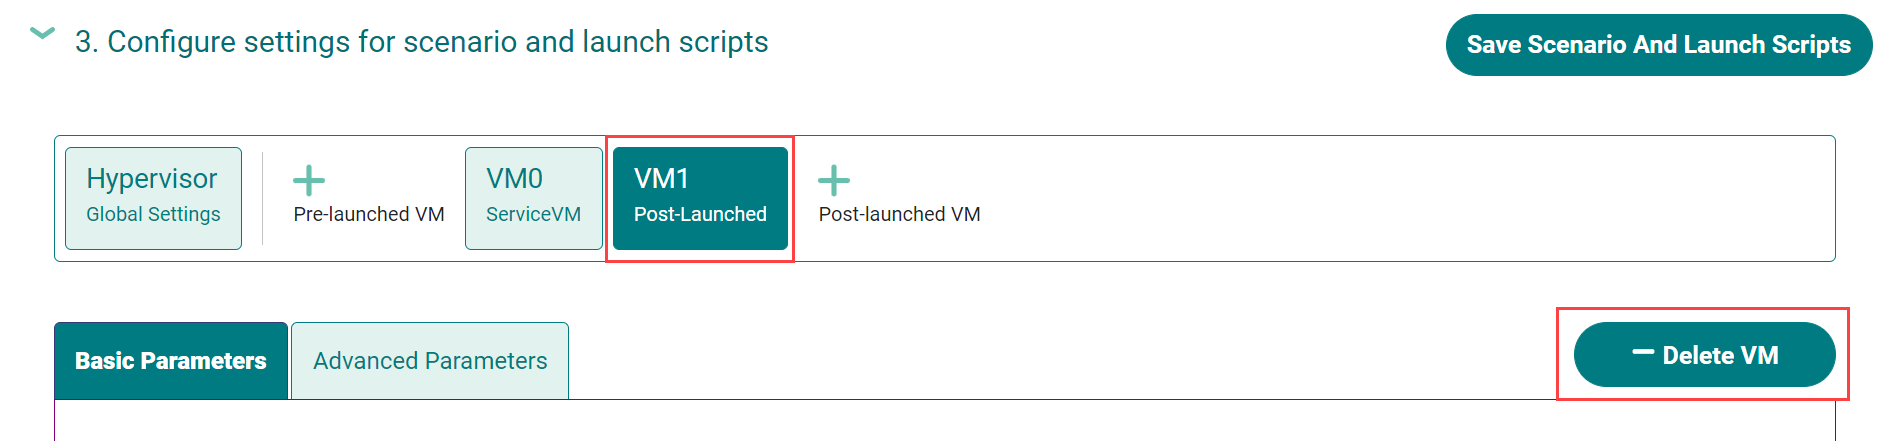
Delete a VM
In the selector menu, click the VM tab. The selected tab is darker in color.
Click Delete VM.
Save and Check for Errors
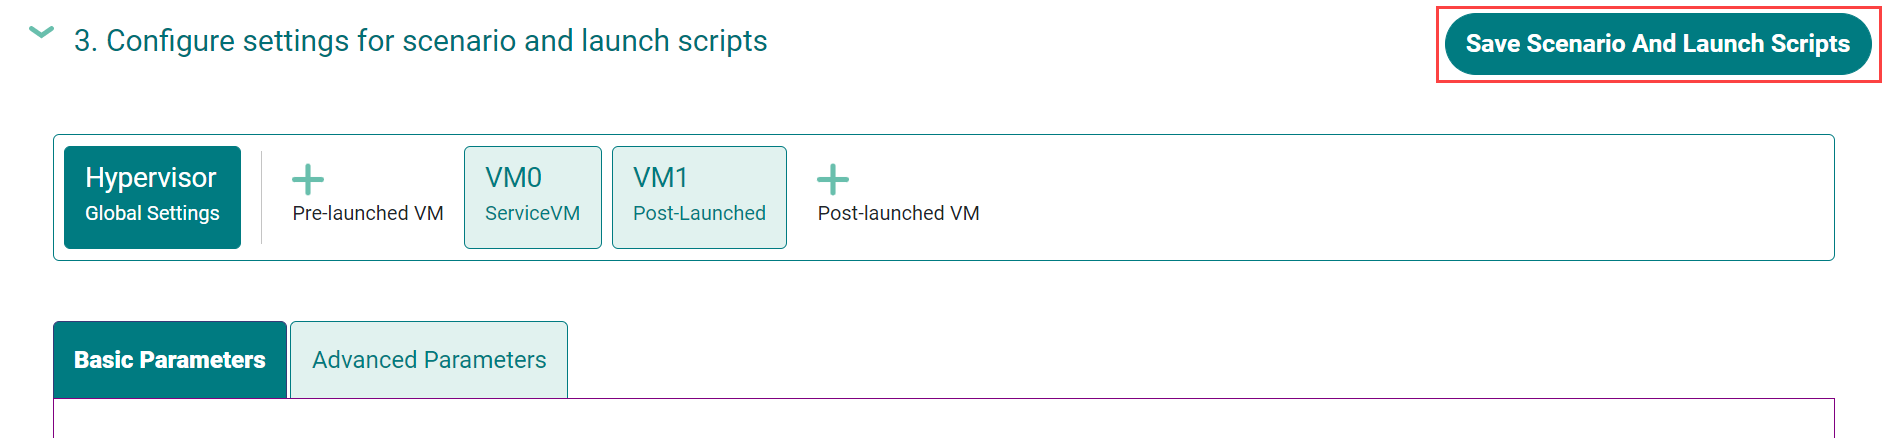
To save your configuration, click Save Scenario And Launch Scripts at the top of the panel.
The tool validates hypervisor and VM settings whenever you save.
If no errors occur, the tool saves your configuration data in a set of files in the working folder:
Scenario configuration file (
scenario.xml): Raw format of all hypervisor and VM settings. You will need this file to build ACRN.One launch script per post-launched VM (
launch_user_vm_id*.sh): This file is used to start the post-launched VM in the Service VM. You can find the VM’s name inside the script:# Launch script for VM name: <name>
If an error occurs, such as an empty required field, the tool saves the changes to the scenario configuration file, but prompts you to correct the error.
On the selector menu, check for error messages on all tabs that have an error icon. The following figure shows that the Hypervisor tab and the VM1 tab contain errors.

Error messages appear below the selector menu or below the applicable parameter.
Fix all errors and save again to generate a valid configuration.
Click the x in the upper-right corner to close the ACRN Configurator.
Next Steps
After generating a valid scenario configuration file, you can build ACRN. See Build ACRN.
Build ACRN Configurator From Source Code
The prerequisites use a prebuilt Debian package to install the ACRN Configurator. The following steps describe how to build the Debian package from source code.
On the development computer, complete the steps in Prepare the Development Computer.
Install the ACRN Configurator build tools:
sudo apt install -y libwebkit2gtk-4.0-dev \
   build-essential \
   curl \
   wget \
   libssl-dev \
   libgtk-3-dev \
   libappindicator3-dev \
   librsvg2-dev \
   python3-venv
Install Node.js (npm included) as follows:
We recommend using nvm to manage your Node.js runtime. It allows you to switch versions and update Node.js easily.
curl -o- https://raw.githubusercontent.com/nvm-sh/nvm/v0.35.2/install.sh | bashRerun your
.bashrcinitialization script and then install the latest version of Node.js and npm:source ~/.bashrc nvm install node --latest-npm nvm use node
Install and upgrade Yarn:
npm install --global yarn
Install rustup, the official installer for Rust:
curl --proto '=https' --tlsv1.2 -sSf https://sh.rustup.rs | sh
When prompted by the Rust installation script, type
1and press Enter.1) Proceed with installation (default) 2) Customize installation 3) Cancel installation >1
Configure the current shell:
source $HOME/.cargo/env
Install additional ACRN Configurator dependencies:
cd ~/acrn-work/acrn-hypervisor/misc/config_tools/configurator
python3 -m pip install -r requirements.txt
yarn
Build the ACRN Configurator Debian package:
cd ~/acrn-work/acrn-hypervisor
make configurator
Install the ACRN Configurator:
sudo apt install -y ~/acrn-work/acrn-hypervisor/build/acrn-configurator*.deb
Launch the ACRN Configurator:
acrn-configurator