Using Windows as Guest VM on ACRN
This tutorial describes how to launch Windows as a Guest (WaaG) VM on the ACRN hypervisor.
Validated Versions
- Clear Linux version: 31080
- ACRN hypervisor tag: v1.3
- Service VM Kernel version: acrn-2019w42.4-140000p
Hardware setup
The following Intel Kaby Lake NUCs are verified:
| Platform Model | BIOS Version | BIOS Download Link |
|---|---|---|
| NUC7i7DNHE | DNKBLi7v.86A.0052.2018.0808.1344 | link |
| NUC7i5DNHE | DNKBLi5v.86A.0060.2018.1220.1536 | link |
ACRN Service VM Setup
You may refer to the steps in Getting Started Guide for the Intel NUC for Intel NUC to set up ACRN on the KBL NUC. After following the steps in that guide, you should be able to launch the Service VM successfully.
Setup for Using Windows as Guest VM
All the patches to support WaaG have been upstreamed; you can download them from the acrn-hypervisor repository.
Build ACRN EFI Images
Follow the steps described at Build ACRN from Source to set up the build environment.
Use the
makecommand to compile theacrn.efiandacrn-dm:$ git clone https://github.com/projectacrn/acrn-hypervisor.git $ cd acrn-hypervisor $ git checkout v1.3 $ make FIRMWARE=uefi BOARD=kbl-nuc-i7
Get the outputs from:
$ build/hypervisor/acrn.efi
$ build/devicemodel/acrn-dm
Replace the
acrn.efiandacrn-dmon your NUC:Log in to the ACRN Service VM and then
mountthe EFI partition to/bootscptheacrn.efiandacrn-dmfrom your host:# scp <acrn.efi from your host> /boot/EFI/acrn/ # scp <acrn-dm from your host> /usr/bin/ # chmod +x /usr/bin/acrn-dm && sync
Build Service VM Kernel
Follow the steps described at Build ACRN from Source to set up the build environment.
Follow the steps below to build the ACRN kernel:
$ WORKDIR=`pwd`;
$ JOBS=`nproc`
$ git clone -b master https://github.com/projectacrn/acrn-kernel.git
$ cd acrn-kernel && git checkout acrn-2019w42.4-140000p
$ mkdir -p ${WORKDIR}/{build,build-rootfs}
$ cp kernel_config_uefi_sos ${WORKDIR}/build/.config
$ make olddefconfig O=${WORKDIR}/build && make -j${JOBS} O=${WORKDIR}/build
$ make modules_install INSTALL_MOD_PATH=${WORKDIR}/build-rootfs O=${WORKDIR}/build -j${JOBS}
Update Kernel on KBL NUC
Copy the new kernel image (bzImage) and its modules to the target machine:
# scp <your host>:$WORKDIR/build/arch/x86/boot/bzImage /boot/bzImage
# scp -r <your host>:$WORKDIR/build-rootfs/lib/modules/* /lib/modules/
# cp /boot/loader/entries/acrn.conf  /boot/loader/entries/acrngt.conf
Modify
acrngt.confto the content as given below:title The ACRNGT Service VM linux /bzImage options console=tty0 console=ttyS0 root=/dev/sda3 rw rootwait ignore_loglevel no_timer_check consoleblank=0 i915.nuclear_pageflip=1 i915.avail_planes_per_pipe=0x010101 i915.domain_plane_owners=0x011100001111 i915.enable_gvt=1 i915.enable_conformance_check=0 i915.enable_guc=0 hvlog=2M@0x1FE00000 memmap=2M$0x1FE00000
Note
Change
/dev/sda3to your file system partition.rebootthe Service VM and selectThe ACRNGT Service VMfrom the boot menu to apply the ACRN kernel and hypervisor updates.
Create Windows 10 Image
Create a Windows 10 image which includes two steps:
- Re-generate an ISO that includes virtio-win drivers and the Windows graphics drivers that were pre-installed from the original Windows ISO.
- Install Windows 10 onto the virtual disk.
Preparations
- Download Windows 10 ADK according to your working Windows 10 version.
Note
Win + R to open the Run window. Key in winver to get your working Windows version.
- Download Windows 10 LTSC ISO.
- Download virtio Windows driver
to the Service VM in
/root/img/virtio-win-0.1.141.iso. - Download Intel DCH Graphics Driver.
Install Windows 10 ADK
Double click
adksetup.exeto start the installation.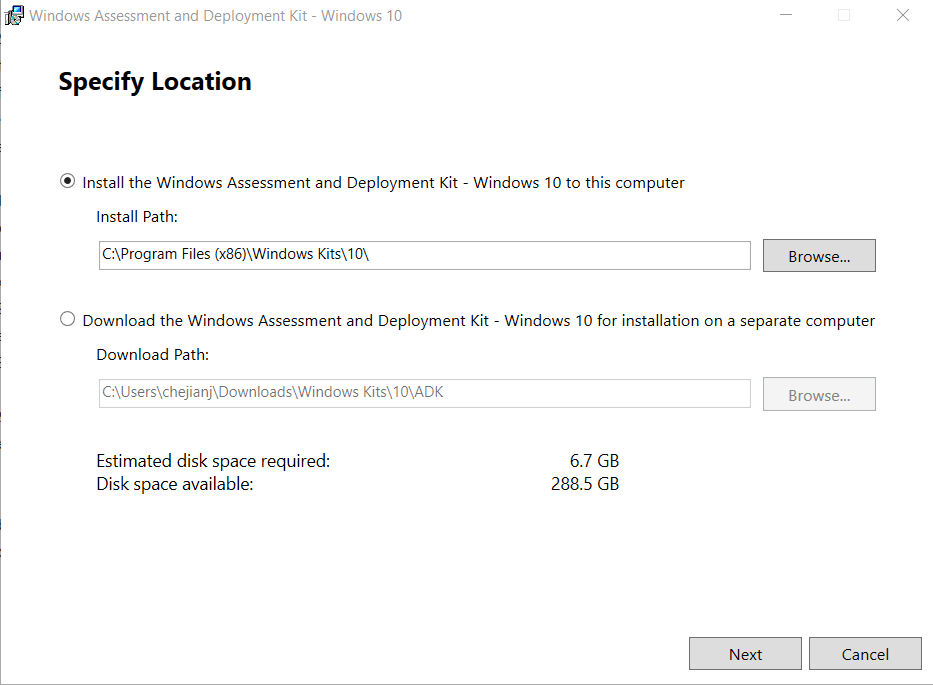
Click
Next.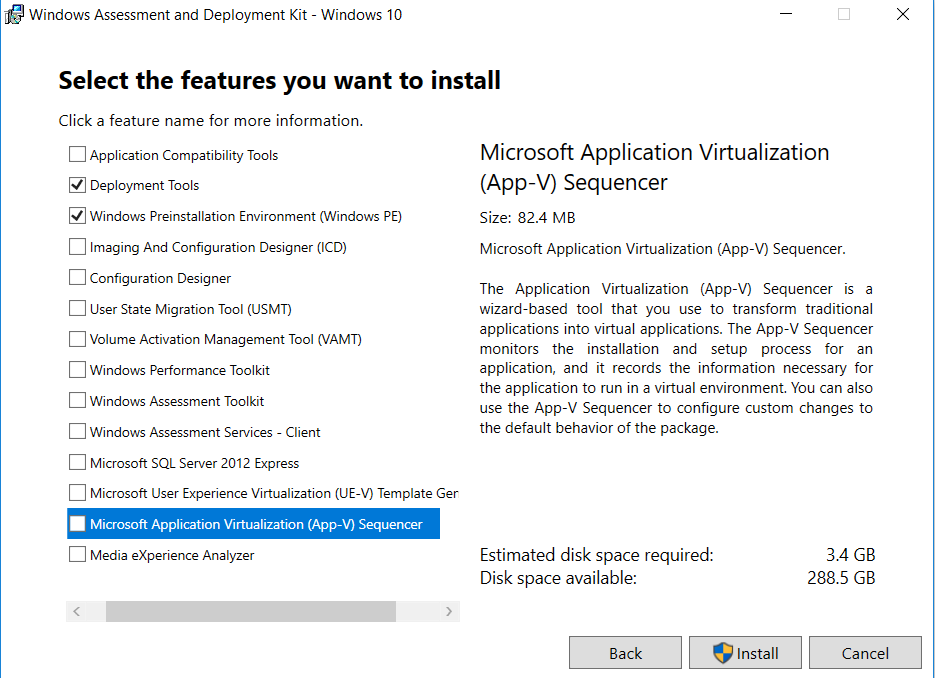
Select
Deployment ToolsandWindows Preinstallation Environment (Windows PE), and clickInstallto continue the installation.Note
You need to install Windows 10 ADK only once.
Pre-install drivers and re-generate Windows ISO
Create a folder on the
C:drive calledWIM, so you have a folderC:\WIMCreate a folder on the
C:drive calledMount, so you have a folderC:\MountRight click the downloaded
virtio-win-0.1.141.isoand selectMount. The ISO will be mounted to a drive; for example, driveD:Use
7-zipor similar utility to unzip the downloaded Windows graphics driverdch_igcc_win64_25.20.100.6618.exeto a folder, for example, toC:\Dev\Temp\wim\dch_igcc_win64_25.20.100.6618Right click the downloaded Windows ISO, for example,
windows10-17763-107-LTSC.iso, selectMount, the ISO will be mounted to a drive; for example, driveE:Copy
E:\sources\boot.wimandE:\sources\install.wimtoC:\WIMDepending on your Windows ISO image, more than one image may be included in the
WIM. Rundism /get-wiminfo /wimfile:C:\WIM\install.wimwith administrator privileges. Select theIndexyou want. Forwindows10-17763-107-LTSC.iso, there is only oneIndex; it is1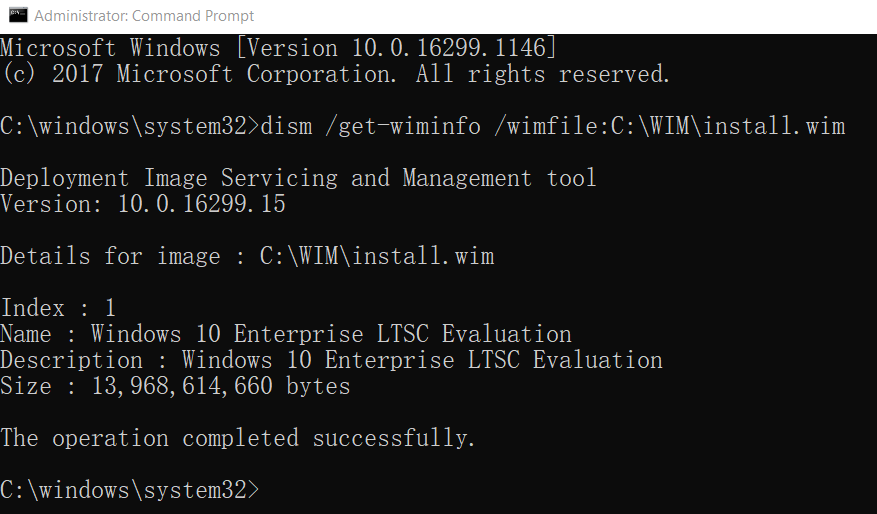
Create a batch file named
virtio-inject-boot.bat[1] to modifyboot.wimto inject drivers (using the mounted Windows ISO drive (D:), image Index (1), and folder where the unzipped Windows graphics drivers were placed, from the previous steps (update this batch file as needed):REM virt-inject-boot Set IDX=1 REM Modify boot.wim file to inject drivers dism /Mount-Wim /WimFile:C:\WIM\boot.wim /Index:%IDX% /MountDir:C:\Mount dism /image:C:\Mount /Add-Driver "/driver:d:\balloon\w10\amd64\balloon.inf" /forceunsigned dism /image:C:\Mount /Add-Driver "/driver:d:\NetKVM\w10\amd64\netkvm.inf" /forceunsigned dism /image:C:\Mount /Add-Driver "/driver:d:\viorng\w10\amd64\viorng.inf" /forceunsigned dism /image:C:\Mount /Add-Driver "/driver:d:\vioscsi\w10\amd64\vioscsi.inf" /forceunsigned dism /image:C:\Mount /Add-Driver "/driver:d:\vioserial\w10\amd64\vioser.inf" /forceunsigned dism /image:C:\Mount /Add-Driver "/driver:d:\viostor\w10\amd64\viostor.inf" /forceunsigned dism /image:C:\Mount /Add-Driver "/driver:d:\vioinput\w10\amd64\vioinput.inf" /forceunsigned dism /image:C:\Mount /Add-Driver "/driver:c:\Dev\Temp\wim\dch_igcc_win64_25.20.100.6618\Graphics\cui_dch.inf" dism /image:C:\Mount /Add-Driver "/driver:c:\Dev\Temp\wim\dch_igcc_win64_25.20.100.6618\Graphics\HdBusExt.inf" dism /image:C:\Mount /Add-Driver "/driver:c:\Dev\Temp\wim\dch_igcc_win64_25.20.100.6618\Graphics\iigd_dch.inf" dism /image:C:\Mount /Add-Driver "/driver:c:\Dev\Temp\wim\dch_igcc_win64_25.20.100.6618\Graphics\DisplayAudio\11.1\IntcDAud.inf" dism /image:C:\Mount /Add-Driver "/driver:c:\Dev\Temp\wim\dch_igcc_win64_25.20.100.6618\Graphics\msdk.inf" dism /unmount-wim /mountdir:c:\Mount /commit
Run this
virtio-inject-boot.batscript in a command prompt running as administrator. It may take 4-5 minutes to run, depending on your Windows system performance.Similarly, create another batch file named
virtio-inject-install.bat[1] to modifyinstall.wimto inject drivers (and verify the ISO drive, image Index, and drivers folder):REM virt-inject-install Set IDX=1 REM Modify install.wim to inject drivers dism /Mount-Wim /WimFile:C:\WIM\install.wim /Index:%IDX% /MountDir:C:\Mount dism /image:C:\Mount /Add-Driver "/driver:d:\balloon\w10\amd64\balloon.inf" /forceunsigned dism /image:C:\Mount /Add-Driver "/driver:d:\NetKVM\w10\amd64\netkvm.inf" /forceunsigned dism /image:C:\Mount /Add-Driver "/driver:d:\viorng\w10\amd64\viorng.inf" /forceunsigned dism /image:C:\Mount /Add-Driver "/driver:d:\vioscsi\w10\amd64\vioscsi.inf" /forceunsigned dism /image:C:\Mount /Add-Driver "/driver:d:\vioserial\w10\amd64\vioser.inf" /forceunsigned dism /image:C:\Mount /Add-Driver "/driver:d:\viostor\w10\amd64\viostor.inf" /forceunsigned dism /image:C:\Mount /Add-Driver "/driver:d:\vioinput\w10\amd64\vioinput.inf" /forceunsigned dism /image:C:\Mount /Add-Driver "/driver:c:\Dev\Temp\wim\dch_igcc_win64_25.20.100.6618\Graphics\cui_dch.inf" dism /image:C:\Mount /Add-Driver "/driver:c:\Dev\Temp\wim\dch_igcc_win64_25.20.100.6618\Graphics\HdBusExt.inf" dism /image:C:\Mount /Add-Driver "/driver:c:\Dev\Temp\wim\dch_igcc_win64_25.20.100.6618\Graphics\iigd_dch.inf" dism /image:C:\Mount /Add-Driver "/driver:c:\Dev\Temp\wim\dch_igcc_win64_25.20.100.6618\Graphics\DisplayAudio\11.1\IntcDAud.inf" dism /image:C:\Mount /Add-Driver "/driver:c:\Dev\Temp\wim\dch_igcc_win64_25.20.100.6618\Graphics\msdk.inf" dism /unmount-wim /mountdir:c:\Mount /commit
Run this script in a command prompt running as administrator. It may also take 4-5 minutes to run, depending on your Windows system performance.
After running these two scripts the files
C:\WIM\boot.wimandC:\WIM\install.wimwill be updated to install these drivers into the image:- Virtio-balloon
- Virtio-net
- Virtio-rng
- Virtio-scsi
- Virtio-serial
- Virtio-block
- Virtio-input
- Windows graphics drivers
Use 7-zip to unzip the downloaded Windows ISO to a folder; for example, into
C:\Dev\Temp\wim\windows10-17763-107-LTSCDelete
C:\Dev\Temp\wim\windows10-17763-107-LTSC\sources\boot.wimandC:\Dev\Temp\wim\windows10-17763-107-LTSC\sources\install.wimCopy
C:\WIM\boot.wimandC:\WIM\install.wimtoC:\Dev\Temp\wim\windows10-17763-107-LTSC\sourcesDownload and unzip cdrtools-3.01.a23-bootcd.ru-mkisofs.7z to a folder; for example, to
C:\Dev\Temp\wim\cdrtools-3.01.a23-bootcd.ru-mkisofsCreate a batch file named
mkisofs_both_legacy_and_uefi.batcontaining (update folder names as needed to reflect where the referenced files are located on your system, andinputdir,outputisoandmkisofs.exepath, downloaded by the previous step):set inputdir=C:\Dev\Temp\wim\windows10-17763-107-LTSC set outputiso=C:\Dev\Temp\wim\mkisofs_iso\windows10-17763-107-LTSC-Virtio-Gfx.iso set label="WIN10_17763_107_LTSC_VIRTIO_GFX" set biosboot=boot/etfsboot.com set efiboot=efi/microsoft/boot/efisys.bin C:\Dev\Temp\wim\cdrtools-3.01.a23-bootcd.ru-mkisofs\mingw\mkisofs.exe \ -iso-level 4 -l -R -UDF -D -volid %label% -b %biosboot% -no-emul-boot \ -boot-load-size 8 -hide boot.catalog -eltorito-alt-boot \ -eltorito-platform efi -no-emul-boot -b %efiboot% -o %outputiso% \ %inputdir%
Run this
mkisofs_both_legacy_and_uefi.batscript. The resulting ISO will be generated inoutputisolocation you specified.
Create Raw Disk
Run these commands on the Service VM:
# swupd bundle-add kvm-host
# mkdir /root/img
# cd /root/img
# qemu-img create -f raw win10-ltsc-virtio.img 30G
Install Windows 10
Currently, the ACRNGT OVMF GOP driver is not ready; thus, a special VGA
version is used to install Windows 10 on ACRN from scratch. The
acrn.elf, acrn-dm and OVMF binaries are included in the
tarball
together with the script used to install Windows 10.
Uncompress
install_by_vga_gsg.tar.gzto the Service VM:# tar zxvf install_by_vga_gsg.tar.gz && cd install_by_vga_gsgEdit the
acrn-dmcommand line ininstall_vga.shif your configuration is different.- Change
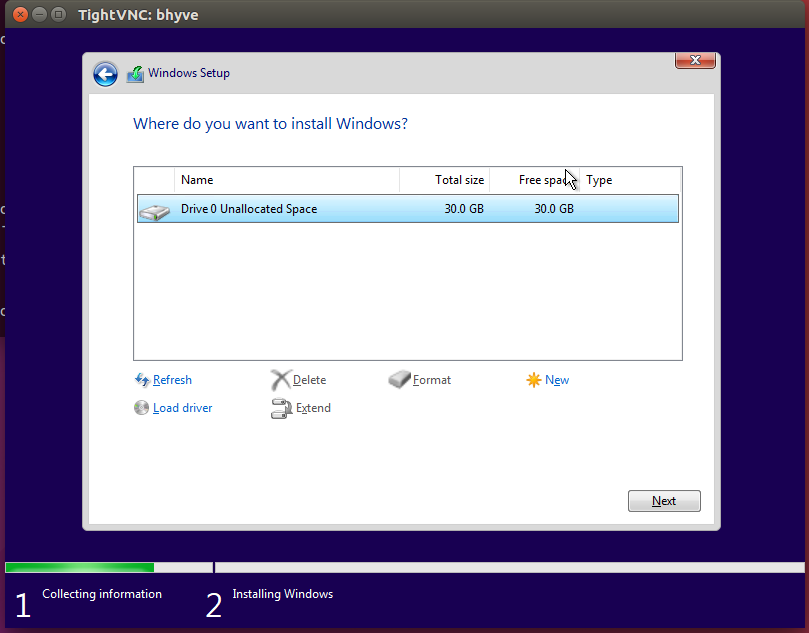
-s 3,virtio-blk,./win10-ltsc-virtio.imgto your path to the Windows 10 image. - Change
-s 8,ahci,cd:./windows10-17763-107-LTSC-Virtio-Gfx.isoto the ISO you re-generated above. - Change
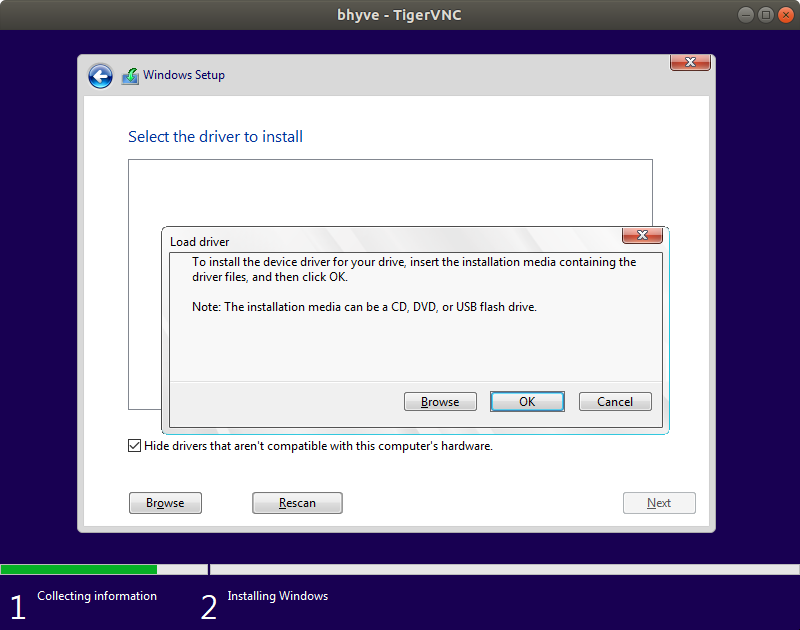
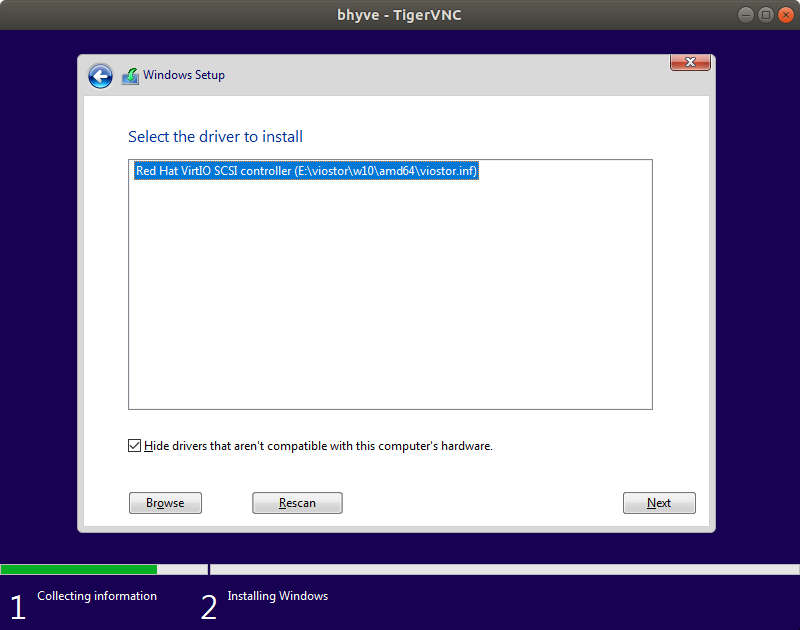
-s 9,ahci,cd:./virtio-win-0.1.141.isoto your path to the virtio-win iso.
- Change
Run
install_vga.shand connect to the Windows guest using a vnc client.:# vncviewer <IP-OF-HOST-MACHINE>:5900Input
exitfollowed by ENTER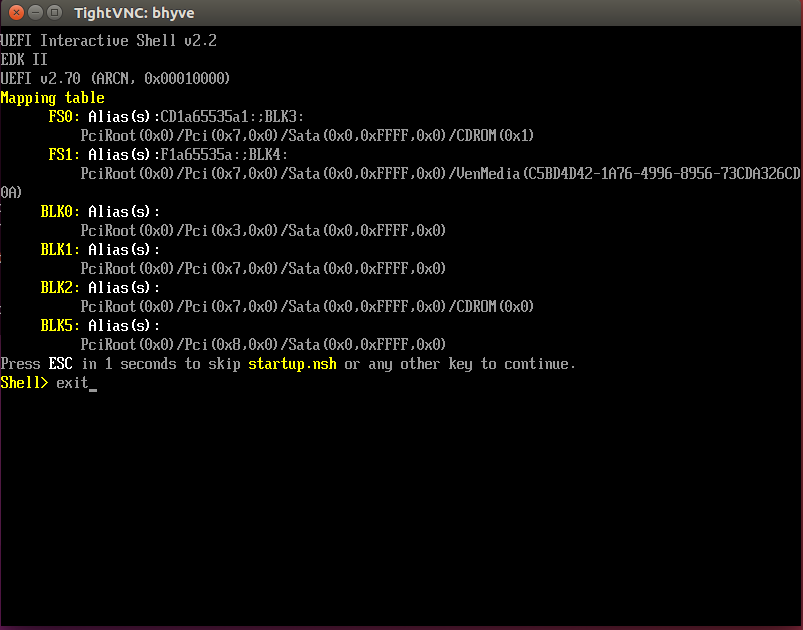
Select
Boot Manager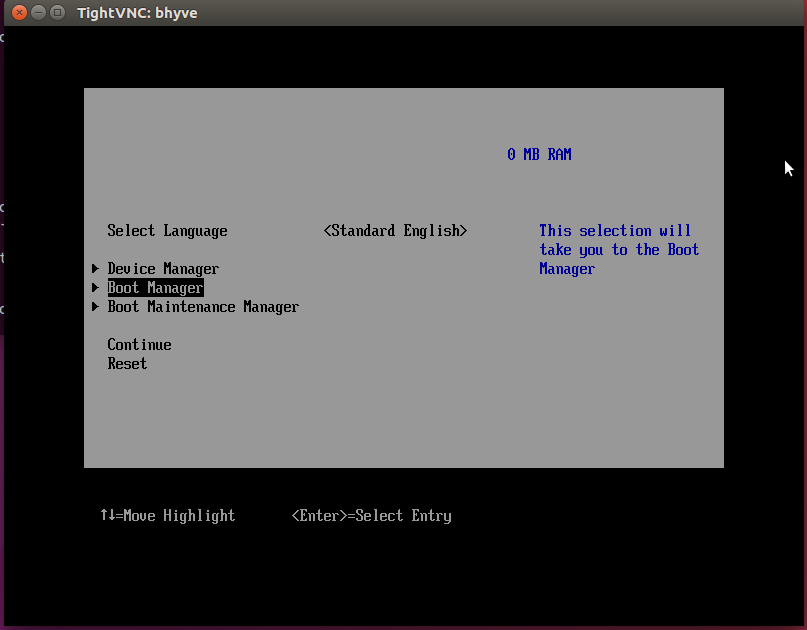
Select
UEFI ACRN-DM SATA DVD ROM ACRN--F9B7-5503-A05B, which is using the PCI slot 7. This is what we configured in the script for the Windows ISO cdrom.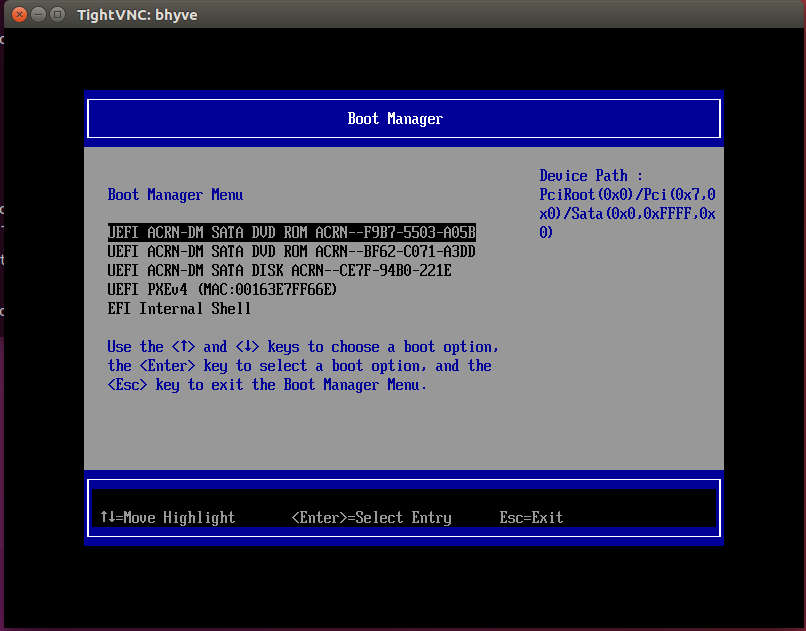
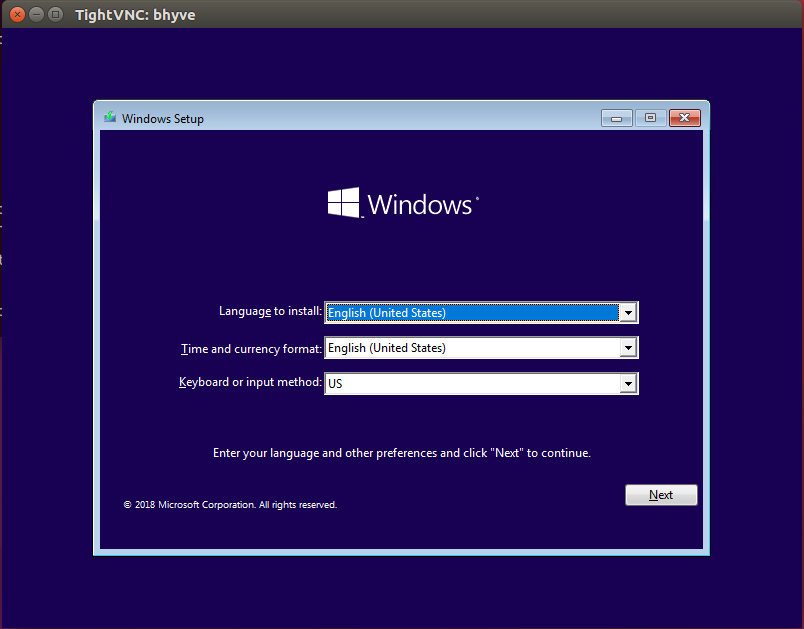
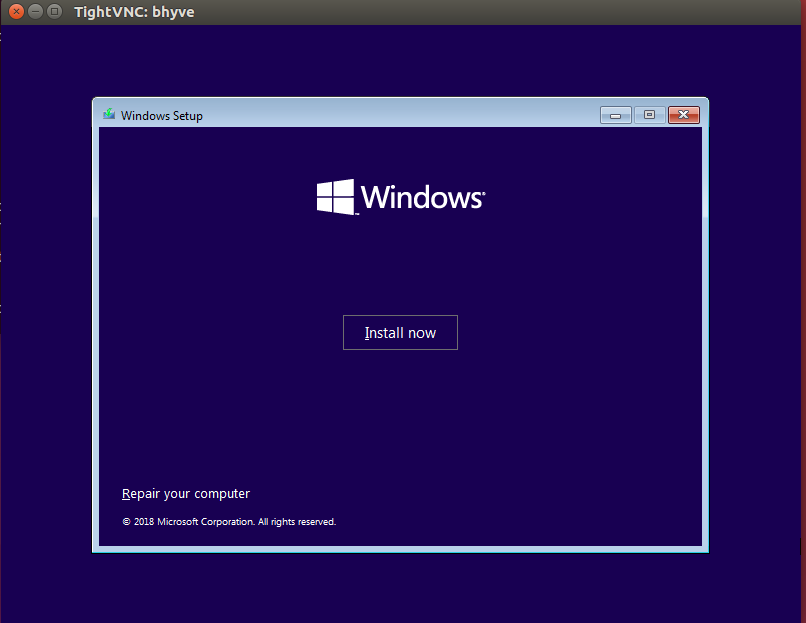
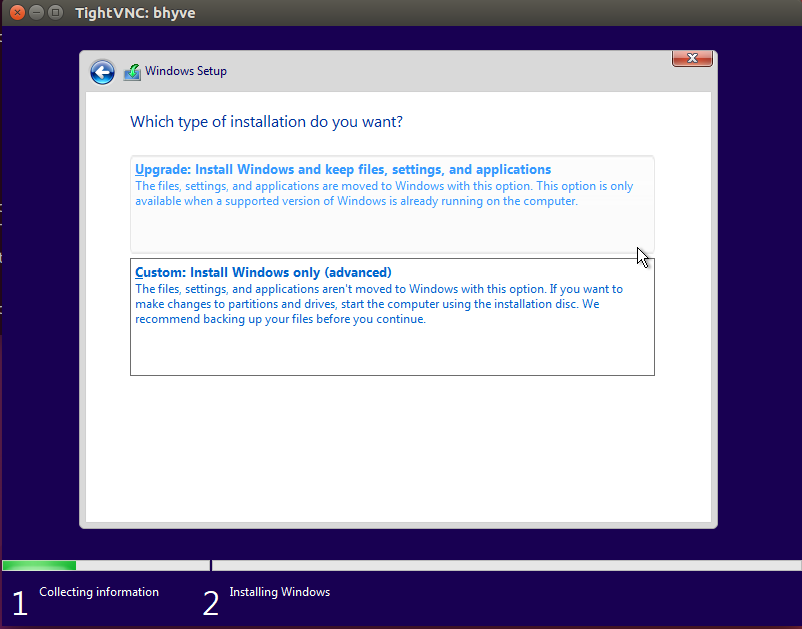
Select ENTER followed by any key press to be prompted to the Windows installation screen.
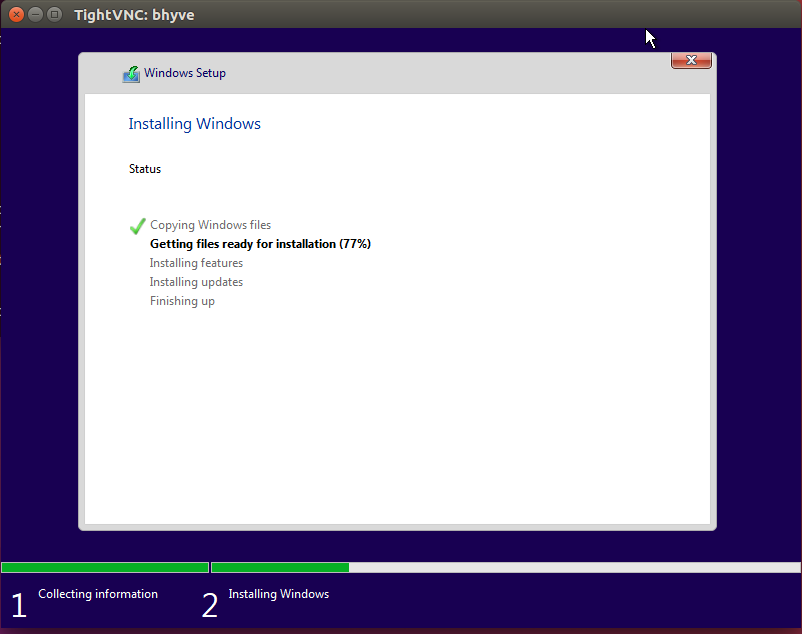
Connect again after Windows guest reboots. Use
vncviewer <IP-OF-HOST-MACHINE>:5900.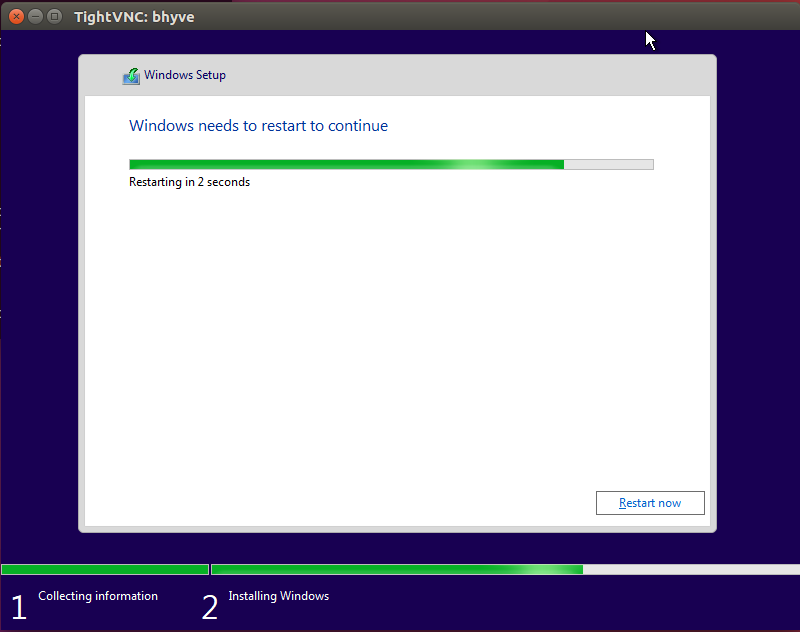
Connect again after Windows guest reboots a second time. Use
vncviewer <IP-OF-HOST-MACHINE>:5900.
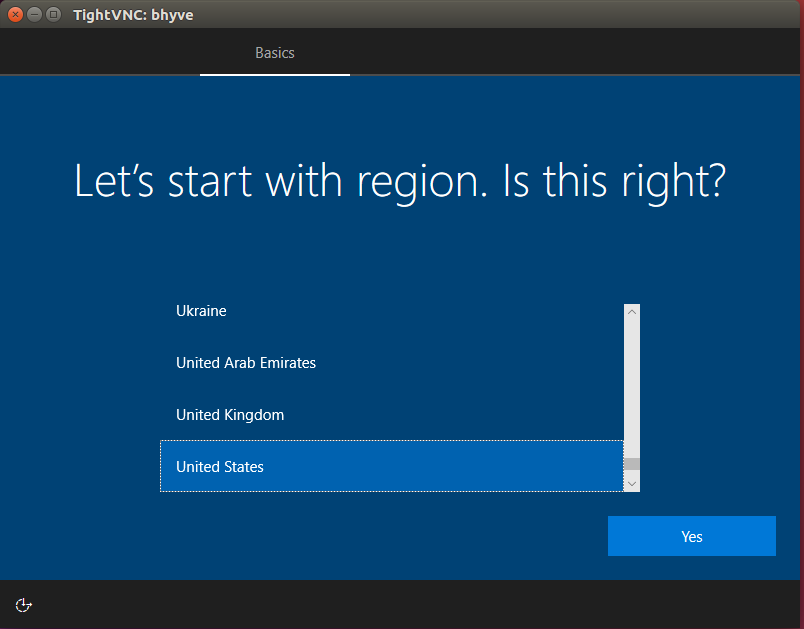
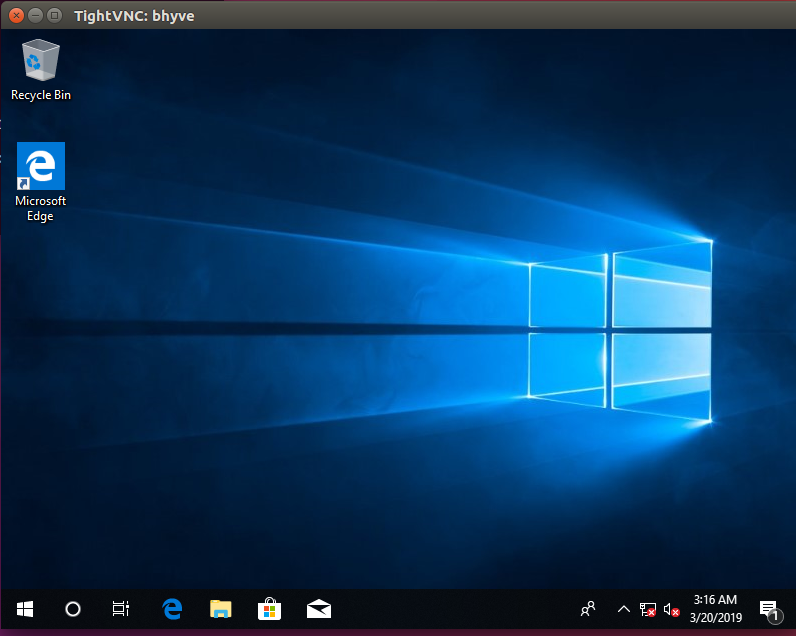
Perform a few configuration steps. The Windows desktop appears.
Boot Windows with GVT-g on ACRN
Modify the
/usr/share/acrn/samples/nuc/launch_win.shscript to specify the Windows image generated above.Run the
launch_win.shand you should see the WaaG desktop coming up over the HDMI monitor (instead of the VNC).Note
Use the following command to disable the GNOME Display Manager (GDM) if it is enabled:
# sudo systemctl mask gdm.serviceNote
You must connect two monitors to the KBL NUC in order to launch Windows with the default configurations above.
Note
The second monitor must include the Weston desktop. If you have set up Weston in the Service VM, follow the steps in GPU Passthrough on Skylake NUC to set up Weston as the desktop environment in Service VM in order to experience Windows with the AcrnGT local display feature.
ACRN Windows verified feature list
- Windows 10 Version:
- Microsoft Windows 10 Enterprise, 10.0.17134 Build 17134
- Microsoft Windows 10 Pro, 10.0.17763 Build 17763
- Windows graphics driver:
- dch_win64_25.20.100.6444.exe
| Items | Details | Status |
|---|---|---|
| IO Devices | Virtio block as the boot device | Working |
| AHCI as the boot device | Working | |
| AHCI cdrom | Working | |
| Virtio network | Working | |
| Virtio input - mouse | Working | |
| Virtio input - keyboard | Working | |
| GOP & VNC remote display | Working | |
| GVT-g | GVT-g without local display | Working with 3D benchmark |
| GVT-g with local display | Working with 3D benchmark | |
| Tools | WinDbg | Working |
| Test cases | Install Windows 10 from scratch | OK |
| Windows reboot | OK | |
| Windows shutdown | OK | |
| Built-in Apps | Microsoft Edge | OK |
| Maps | OK | |
| Microsoft Store | OK | |
| 3D Viewer | OK |
Device configurations of acrn-dm command line
-s 3,ahci,hd:/root/img/win10.img: This is the hard disk onto which to install Windows 10. Make sure that the slot ID 3 points to your win10 img path.
-s 4,virtio-net,tap0: This is for the network virtualization.
-s 5,fbuf,tcp=0.0.0.0:5900,w=800,h=600: This will open a port 5900 on Service VM which can be connected to via vncviewer.
-s 6,virtio-input,/dev/input/event4: This is to passthrough the mouse/keyboard to Windows via virtio. Please change
event4accordingly. You can use the following command to check the event node on your Service VM:<To get the input event of mouse> # cat /proc/bus/input/devices | grep mouse
-s 7,ahci,cd:/root/img/Windows.iso: This is the IOS image used to install Windows 10. It appears as a cdrom device. Make sure that the slot ID 7 points to your win10 ISO path.
-s 8,ahci,cd:/root/img/virtio-win-0.1.141.iso: This is another cdrom device to install the virtio Windows driver later. Make sure it points to your VirtIO ISO path.
–ovmf /usr/share/acrn/bios/OVMF.fd: Make sure it points to your OVMF binary path
References
| [1] | (1, 2) These virtio drivers injecting batch script are based on Derek Seaman’s IT blog about injecting VirtIO Drivers into Windows. |