Getting started guide for UP2 board
Hardware setup
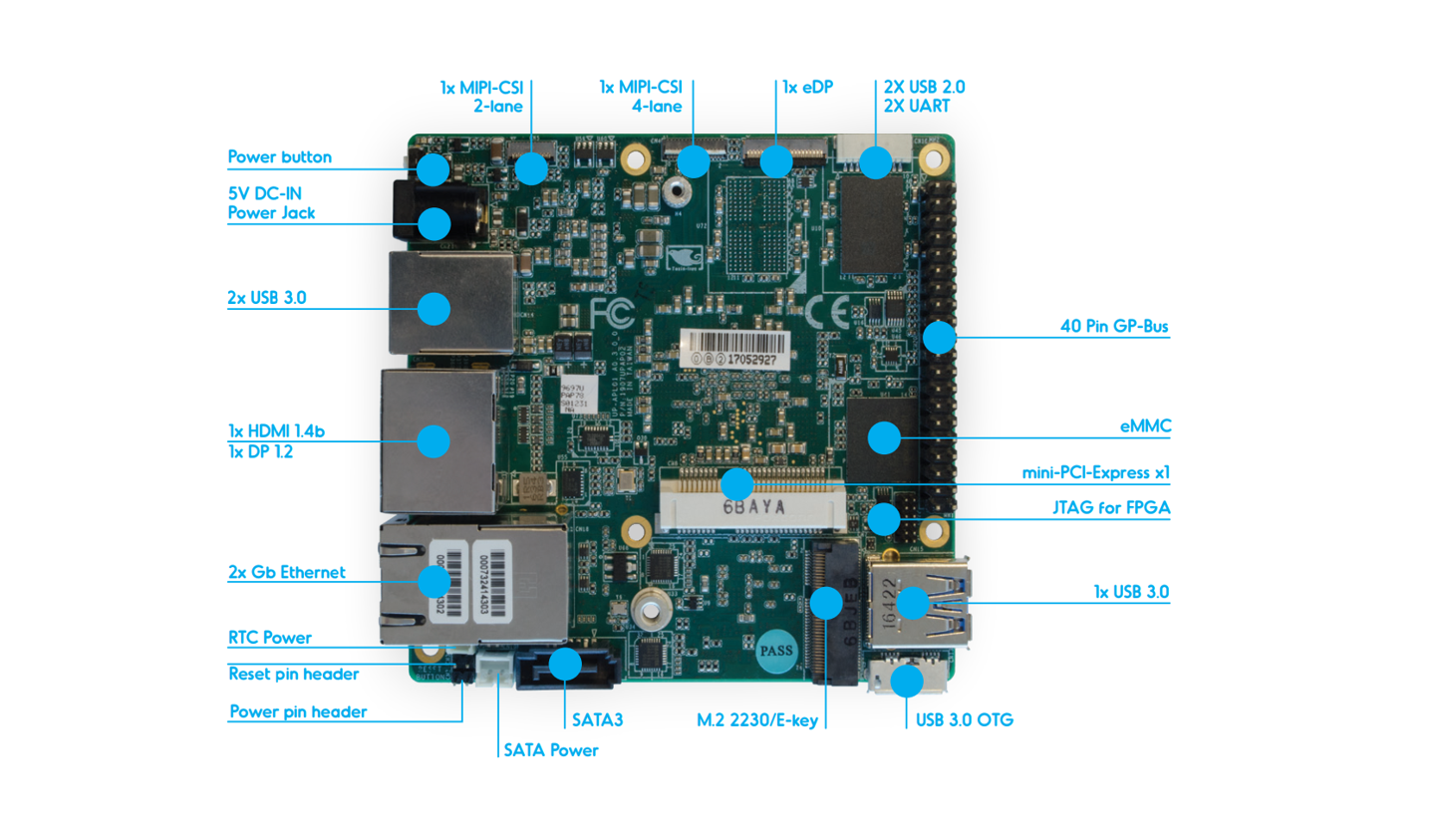
The UP Squared board (UP2) is an x86 maker board based on the Intel Apollo Lake platform. The UP boards are used in IoT applications, industrial automation, digital signage, and more.
The UP2 features Intel Celeron N3550 and Intel Pentium N4200 SoCs. Both have been confirmed to work with ACRN.
Connecting to the serial port
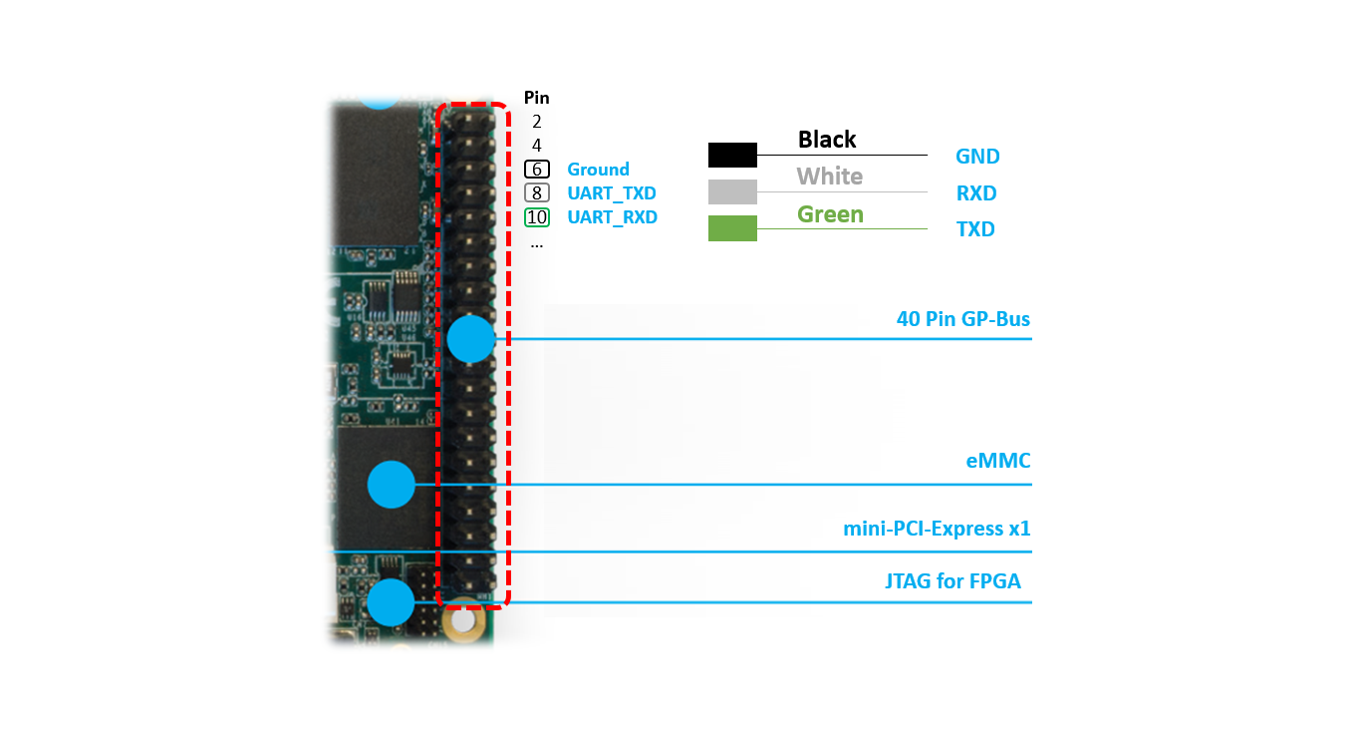
The UP2 board has two serial ports. The following figure shows the UP2 board’s 40-pin HAT connector we’ll be using as documented in the UP2 Datasheet.
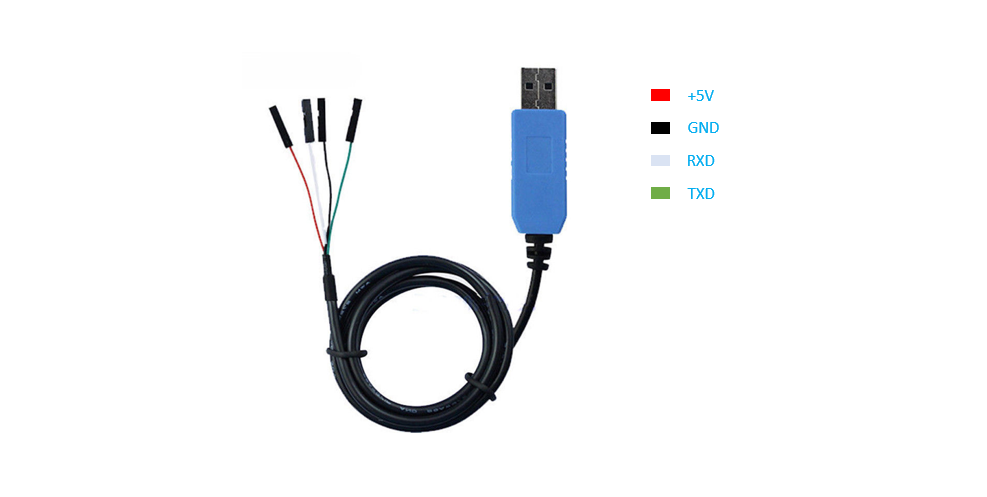
We’ll access the serial port through the I/O pins in the
40-pin HAT connector using a USB TTL serial cable,
and show how to connect a serial port with
PL2303TA USB to TTL serial cable for example:
Connect pin 6 (Ground), pin 8 (UART_TXD) and pin 10 (UART_RXD) of the HAT
connector to respectively the GND, RX and TX pins of your
USB serial cable. Plug the USB TTL serial cable into your PC and use a
console emulation tool such as minicom or putty to communicate
with the UP2 board for debugging.
Software setup
Setting up the ACRN hypervisor (and associated components) on the UP2 board is no different than other hardware platforms so please follow the instructions provided in the Getting Started Guide for the Intel NUC, with the additional information below.
There are a few parameters specific to the UP2 board that differ from what is referenced in the Getting Started Guide for the Intel NUC section:
- Serial Port settings
- Storage device name
You will need to keep these in mind in a few places:
When mounting the EFI System Partition (ESP)
# mount /dev/mmcblk0p1 /mnt
When adjusting the
acrn.conffile- Set the
root=parameter using thePARTUUIDor device name directly
- Set the
When configuring the EFI firmware to boot the ACRN hypervisor by default
# efibootmgr -c -l "\EFI\acrn\acrn.efi" -d /dev/mmcblk0 -p 1 -L "ACRN Hypervisor" \
    -u "bootloader=\EFI\org.clearlinux\bootloaderx64.efi uart=bdf@0:18.1"
UP2 serial port setting
The serial port (ttyS1) in the 40-pin HAT connector is located at serial PCI BDF 0:18.1.
You can check this from the lspci output from the initial Clearlinux installation.
Also you can use dmesg | grep tty to get its IRQ information for console setting; and update
SOS bootargs console=ttyS1 in acrn.conf to match with console setting.
# lspci | grep UART
00:18.0 . Series HSUART Controller #1 (rev 0b)
00:18.1 . Series HSUART Controller #2 (rev 0b)

# dmesg | grep tty
dw-apb-uart.8: ttyS0 at MMIO 0x91524000 (irq = 4, base_baud = 115200) is a 16550A
dw-apb-uart.9: ttyS1 at MMIO 0x91522000 (irq = 5, base_baud = 115200) is a 16550A
The second entry associated with 00:18.1 @irq5 is the one on the 40-pin HAT connector.
UP2 block device
The UP2 board has an on-board eMMC device. The device name to be used
throughout the Try using ACRN therefore is /dev/mmcblk0
(and /dev/mmcblk0pX for any partition).
The UUID of the partition /dev/mmcblk0p3 can be found by
# blkid /dev/mmcblk
Note
You can also use the device name directly, e.g.: root=/dev/mmcblk0p3
Running the hypervisor
Now that the hypervisor and Service OS have been installed on your UP2 board, you can proceed with the rest of the instructions in the Getting Started Guide for the Intel NUC and install the User OS (UOS).