Getting started guide for Intel NUC
The Intel® NUC (NUC6CAYH) is the primary tested platform for ACRN development, and its setup is described below.
Hardware setup
Two Apollo Lake Intel platforms, described in Supported Hardware, are currently supported for ACRN development:
- The UP Squared board (UP2) is also known to work and its setup is described in Getting started guide for UP2 board.
Firmware update on the NUC
You may need to update to the latest UEFI firmware for the NUC hardware. Follow these BIOS Update Instructions for downloading and flashing an updated BIOS for the NUC.
Software setup
Set up a Clear Linux Operating System
Currently, an installable version of ARCN does not exist. Therefore, you need to setup a base Clear Linux OS and you’ll build and bootstrap ACRN on your platform. You’ll need a network connection for your platform to complete this setup.
Note
Please refer to the ACRN Release Notes for the Clear Linux OS version number tested with a specific ACRN release. Adjust the instruction below to reference the appropriate version number of Clear Linux OS (we use version 27960 as an example).
Download the compressed Clear Linux OS installer image from https://download.clearlinux.org/releases/27960/clear/clear-27960-installer.img.xz and follow the Clear Linux OS installation guide as a starting point for installing Clear Linux OS onto your platform. Follow the recommended options for choosing an Manual (Advanced) installation type, and using the platform’s storage as the target device for installation (overwriting the existing data and creating three partitions on the platform’s storage drive).
High-level steps should be:
- Install Clear Linux OS on a NUC using the “Manual (Advanced)” option.
- Use default partition scheme for storage
- Name the host “clr-sos-guest”
- Add an administrative user “clear” with “sudoers” privilege
- Add these additional bundles “editors”, “user-basic”, “desktop-autostart”, “network-basic”
- For network, choose “DHCP”
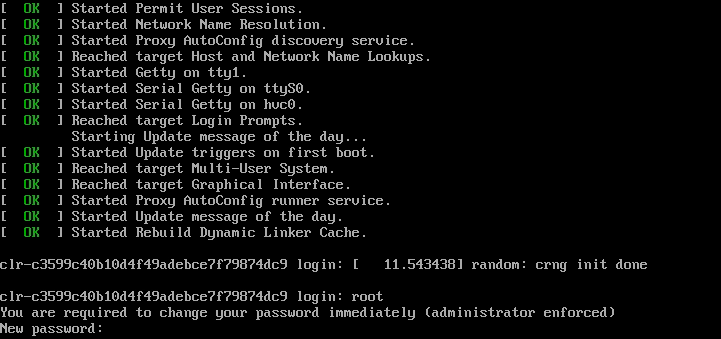
After installation is complete, boot into Clear Linux OS, login as clear, and set a password.
Clear Linux OS is set to automatically update itself. We recommend that you disable this feature to have more control over when the updates happen. Use this command to disable the autoupdate feature:
$ sudo swupd autoupdate --disable
Note
The Clear Linux OS installer will automatically check for updates and install the latest version available on your system. If you wish to use a specific version (such as 27960), you can achieve that after the installation has completed using
sudo swupd verify --fix --picky -m 27960If you have an older version of Clear Linux OS already installed on your hardware, use this command to upgrade Clear Linux OS to version 27960 (or newer):
$ sudo swupd update -m 27960 # or newer version
Use the
sudo swupd bundle-addcommand and add these Clear Linux OS bundles:$ sudo swupd bundle-add service-os kernel-iot-lts2018
Table 1 Clear Linux OS bundles¶ Bundle Description service-os Add the acrn hypervisor, the acrn devicemodel and Service OS kernel kernel-iot-lts2018 Run the Intel kernel “kernel-iot-lts2018” which is enterprise-style kernel with backports
Add the ACRN hypervisor to the EFI Partition
In order to boot the ACRN SOS on the platform, you’ll need to add it to the EFI partition. Follow these steps:
Mount the EFI partition and verify you have the following files:
$ sudo ls -1 /boot/EFI/org.clearlinux
bootloaderx64.efi
kernel-org.clearlinux.native.4.20.11-702
kernel-org.clearlinux.iot-lts2018-sos.4.19.23-19
kernel-org.clearlinux.iot-lts2018.4.19.23-19
loaderx64.efi
Note
On Clear Linux OS, the EFI System Partion (e.g.:
/dev/sda1) is mounted under/bootby default The Clear Linux project releases updates often, sometimes twice a day, so make note of the specific kernel versions (iot-lts2018 and *iot-lts2018-sos) listed on your system, as you will need them later.Note
The EFI System Partition (ESP) may be different based on your hardware. It will typically be something like
/dev/mmcblk0p1on platforms that have an on-board eMMC or/dev/nvme0n1p1if your system has a non-volatile storage media attached via a PCI Express (PCIe) bus (NVMe).Put the
acrn.efihypervisor application (included in the Clear Linux OS release) on the EFI partition with:$ sudo mkdir /boot/EFI/acrn $ sudo cp /usr/lib/acrn/acrn.efi /boot/EFI/acrn/
Configure the EFI firmware to boot the ACRN hypervisor by default
The ACRN hypervisor (
acrn.efi) is an EFI executable loaded directly by the platform EFI firmware. It then in turns loads the Service OS bootloader. Use theefibootmgrutility to configure the EFI firmware and add a new entry that loads the ACRN hypervisor.$ sudo efibootmgr -c -l "\EFI\acrn\acrn.efi" -d /dev/sda -p 1 -L "ACRN"
Note
Be aware that a Clear Linux OS update that includes a kernel upgrade will reset the boot option changes you just made. A Clear Linux OS update could happen automatically (if you have not disabled it as described above), if you later install a new bundle to your system, or simply if you decide to trigger an update manually. Whenever that happens, double-check the platform boot order using
efibootmgr -vand modify it if needed.The ACRN hypervisor (
acrn.efi) accepts three command-line parameters that tweak its behaviour:bootloader=: this sets the EFI executable to be loaded once the hypervisor is up and running. This is typically the bootloader of the Service OS and the default value is to use the Clear Linux OS bootloader, i.e.:\EFI\org.clearlinux\bootloaderx64.efi.uart=: this tells the hypervisor where the serial port (UART) is found or whether it should be disabled. There are three forms for this parameter:uart=disabled: this disables the serial port completelyuart=bdf@<BDF value>: this sets the PCI serial port based on its BDF. For example, usebdf@0:18.1for a BDF of 0:18.1 ttyS1.uart=port@<port address>: this sets the serial port address
vuart=ttySn@irqN: this tells the hypervisor which virtual serial device SOS will use and its IRQ number. This is used to avoid conflict with SOS passthrough devices’ interrupt. If UART is set to ttyS1, and its native IRQ is 5, you’d better setvuart=ttyS1@irq5(Use ‘dmesg | grep tty’ to get IRQ information). Also setconsole=ttyS1inacrn.confto match the SOS boot args.
Here is a more complete example of how to configure the EFI firmware to load the ACRN hypervisor and set these parameters.
$ sudo efibootmgr -c -l "\EFI\acrn\acrn.efi" -d /dev/sda -p 1 -L "ACRN NUC Hypervisor" \
      -u "bootloader=\EFI\org.clearlinux\bootloaderx64.efi uart=disabled"
Create a boot entry for the ACRN Service OS by copying a provided
acrn.confand editing it to account for the kernel versions noted in a previous step.It must contain these settings:
Setting Description title Text to show in the boot menu linux Linux kernel for the Service OS (*-sos) options Options to pass to the Service OS kernel (kernel parameters) A starter acrn.conf configuration file is included in the Clear Linux OS release and is also available in the acrn-hypervisor/hypervisor GitHub repo as acrn.conf as shown here:
title The ACRN Service OS
linux   /EFI/org.clearlinux/kernel-org.clearlinux.iot-lts2018-sos.4.19.13-1901141830
options console=tty0 console=ttyS0 root=PARTUUID=<UUID of rootfs partition> rw rootwait ignore_loglevel no_timer_check consoleblank=0 i915.nuclear_pageflip=1 i915.avail_planes_per_pipe=0x01010F i915.domain_plane_owners=0x011111110000 i915.enable_gvt=1 i915.enable_guc=0 hvlog=2M@0x1FE00000
On the platform, copy the
acrn.conffile to the EFI partition we mounted earlier:$ sudo cp /usr/share/acrn/samples/nuc/acrn.conf /boot/loader/entries/
You will need to edit this file to adjust the kernel version (
linuxsection), insert thePARTUUIDof your/dev/sda3partition (root=PARTUUID=<UUID of rootfs partition>) in theoptionssection, and add thehugepagesz=1G hugepages=2at end of theoptionssection.Use
blkidto find out what your/dev/sda3PARTUUIDvalue is. Here is a handy one-line command to do that:# sed -i "s/<UUID of rootfs partition>/`blkid -s PARTUUID -o value \ /dev/sda3`/g" /boot/loader/entries/acrn.confNote
It is also possible to use the device name directly, e.g.
root=/dev/sda3Add a timeout period for Systemd-Boot to wait, otherwise it will not present the boot menu and will always boot the base Clear Linux OS
$ sudo clr-boot-manager set-timeout 20
$ sudo clr-boot-manager update
Reboot and select “The ACRN Service OS” to boot, as shown below:
=> The ACRN Service OS
Clear Linux OS for Intel Architecture (Clear-linux-iot-lts2018-4.19.23-19)
Clear Linux OS for Intel Architecture (Clear-linux-iot-lts2018-sos-4.19.23-19)
Clear Linux OS for Intel Architecture (Clear-linux-native.4.20.11-702)
EFI Default Loader
Reboot Into Firmware Interface
After booting up the ACRN hypervisor, the Service OS will be launched automatically by default, and the Clear Linux OS desktop will be showing with user “clear”, (or you can login remotely with an “ssh” client). If there is any issue which makes the GNOME desktop doesn’t show successfully, then the system will go to shell console.
From ssh client, login as user “clear” using the password you set previously when you installed Clear Linux OS.
After rebooting the system, check that the ACRN hypervisor is running properly with:
$ dmesg | grep ACRN
[    0.000000] Hypervisor detected: ACRN
[    1.687128] ACRNTrace: acrn_trace_init, cpu_num 4
[    1.693129] ACRN HVLog: acrn_hvlog_init
If you see log information similar to this, the ACRN hypervisor is running properly
and you can start deploying a User OS. If not, verify the EFI boot options, SOS
kernel, and acrn.conf settings are correct (as described above).
ACRN Network Bridge
ACRN bridge has been setup as a part of systemd services for device communication. The default
bridge creates acrn_br0 which is the bridge and acrn_tap0 as an initial setup. The files can be
found in /usr/lib/systemd/network. No additional setup is needed since systemd-networkd is
automatically enabled after a system restart.
Set up Reference UOS
On your platform, download the pre-built reference Clear Linux OS UOS image version 27960 (or newer) into your (root) home directory:
$ cd ~
$ mkdir uos
$ cd uos
$ curl https://download.clearlinux.org/releases/27960/clear/clear-27960-kvm.img.xz -o uos.img.xz
Note
In case you want to use or try out a newer version of Clear Linux OS as the UOS, you can download the latest from http://download.clearlinux.org/image. Make sure to adjust the steps described below accordingly (image file name and kernel modules version).
Uncompress it:
$ unxz uos.img.xz
Deploy the UOS kernel modules to UOS virtual disk image (note: you’ll need to use the same iot-lts2018 image version number noted in step 1 above):
$ sudo losetup -f -P --show uos.img
$ sudo mount /dev/loop0p3 /mnt
$ sudo cp -r /usr/lib/modules/"`readlink /usr/lib/kernel/default-iot-lts2018 | awk -F '2018.' '{print $2}'`.iot-lts2018" /mnt/lib/modules
$ sudo umount /mnt
$ sync
Edit and Run the
launch_uos.shscript to launch the UOS.A sample launch_uos.sh is included in the Clear Linux OS release, and is also available in the acrn-hypervisor/devicemodel GitHub repo (in the samples folder) as shown here:
#!/bin/bash

offline_path="/sys/class/vhm/acrn_vhm"

# Check the device file of /dev/acrn_hsm to determine the offline_path
if [ -e "/dev/acrn_hsm" ]; then
offline_path="/sys/class/acrn/acrn_hsm"
fi

function launch_clear()
{
mac=$(cat /sys/class/net/e*/address)
vm_name=vm$1
mac_seed=${mac:9:8}-${vm_name}

#check if the vm is running or not
vm_ps=$(pgrep -a -f acrn-dm)
result=$(echo $vm_ps | grep "${vm_name}")
if [[ "$result" != "" ]]; then
  echo "$vm_name is running, can't create twice!"
  exit
fi

#for memsize setting
mem_size=2048M

acrn-dm -A -m $mem_size -c $2 -s 0:0,hostbridge -s 1:0,lpc -l com1,stdio \
  -s 2,pci-gvt -G "$3" \
  -s 5,virtio-console,@pty:pty_port \
  -s 6,virtio-hyper_dmabuf \
  -s 3,virtio-blk,/home/clear/uos/uos.img \
  -s 4,virtio-net,tap0 \
  --mac_seed $mac_seed \
  -k /usr/lib/kernel/default-iot-lts2018 \
  -B "root=/dev/vda3 rw rootwait maxcpus=$2 nohpet console=tty0 console=hvc0 \
  console=ttyS0 no_timer_check ignore_loglevel log_buf_len=16M \
  consoleblank=0 tsc=reliable i915.avail_planes_per_pipe=$4 \
  i915.enable_hangcheck=0 i915.nuclear_pageflip=1 i915.enable_guc_loading=0 \
  i915.enable_guc_submission=0 i915.enable_guc=0" $vm_name
}

# offline SOS CPUs except BSP before launch UOS
for i in `ls -d /sys/devices/system/cpu/cpu[1-99]`; do
        online=`cat $i/online`
        idx=`echo $i | tr -cd "[1-99]"`
        echo cpu$idx online=$online
        if [ "$online" = "1" ]; then
                echo 0 > $i/online
		# during boot time, cpu hotplug may be disabled by pci_device_probe during a pci module insmod
		while [ "$online" = "1" ]; do
			sleep 1
			echo 0 > $i/online
			online=`cat $i/online`
		done
                echo $idx > ${offline_path}/offline_cpu
        fi
done

launch_clear 1 1 "64 448 8" 0x070F00
By default, the script is located in the
/usr/share/acrn/samples/nuc/directory. You can run it to launch the User OS:$ cd /usr/share/acrn/samples/nuc/ $ sudo ./launch_uos.sh
At this point, you’ve successfully booted the ACRN hypervisor, SOS, and UOS: